
How To Create Texture Maps In Gimp
You just modeled the perfect scene and the only thing left is texturing and lighting. You get some great textures from cgtextures.com and apply it only to find your image still doesn’t quite have that pop. The reason for this is, that an image texture is merely a flat projection on your model. It is the same as putting a picture on a wall the photo is only a flat projection. The texture needs some depth and definition. To give the texture what it needs is simple a matter of adding a few things to give it more realism.
Your texture needs a normal map, a specular map, and some displacement to give it the detail it needs to mirror realism. If you have gimp you have the power to generate these maps within that one little program. Gimp can generate normal maps ,bump maps, displacement maps, and even specular maps. You can do it pretty fast with some short and simple steps.
I use a normal map and spec map with my textures. I use the spec map for displacement so I only need to generate the two maps.

Creating the Normal map In Gimp:
-
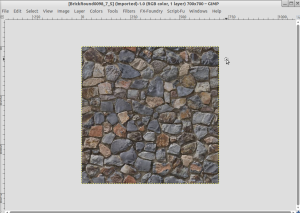
Open up your texture in Gimp
-
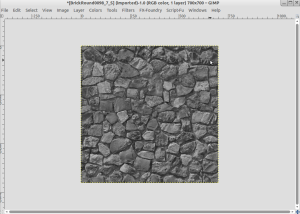
Select color scroll down to desaturate


-
Select filters scroll to normal map in the normal map tab just click ok.
 Click file export, select your texture folder and click export and your normal map is ready to use.
Creating the Specular map In Gimp:
-
Open up your texture in Gimp
-
Select color scroll down to desaturate
-
Select colors scroll to levels
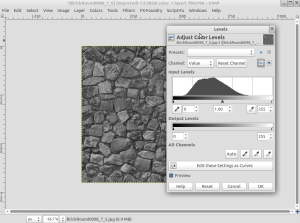
-
adjust the input levels towards the middle
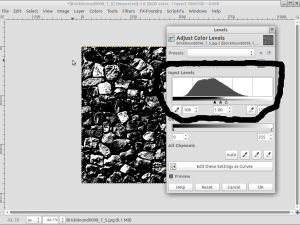


Click file export, select your texture folder and click export and your spec map is ready to use.
Fyi
You may want to put your textures in a folder for example brick texture and place your textures in with names such as brick.jpg, brick_normal.jpg and Brick_spec.jpg. This way all your texture maps are in one place.
Bonus Time
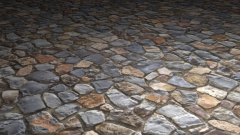
Here we have a basic plane with a diffused texture


Now we add a mix shader and a glossy shader

Now we have this

Now if we add the spec map and a color mix node we will put the texture in the top , set the bottom to black and change the blend mode to multiply then put that in the factor input of the mix shader.

Now we this

Now let select the specular texture and the color mix node duplicate it and place it in the displacement socket

you have this

Then we add our normal map as an image texture connect it to a normal map node the connect it to the normal input of the glossy and diffused shader

Which gives us this result

On the left just a plain image texture on the right our better texture. Which do you prefer?

Additional Resources
The Secrets of Realistic Texturing

thanks a lot. I just followed your tutorial to make my first normal map and spec map and the texture.
YOUR WELCOME . I hope it helped you out. Ididn’t realize how easy it was to make good textures. Thanks for checking out my blog
Thank you very much for this tutorial. It has help me answer questions I have had for a long time. I hope you will make some more. I was watching a tutorial on Blender Cookie and they talked about Spec maps and Bump maps. The Bump map was not the same as the Normal map. Can a bump map be made in GIMP as well?
Thank you for reading my post. I am glad it help you out. To answer your question you can make bump maps, normal maps, displacement map, and spec maps in gimp. I use the spec map for displacement to give my textures a little bump. Enjoy and keep creating.
Exactly what I was looking for! Thank you so much
no problem I hope it helps out