
Flying Geese Part 1
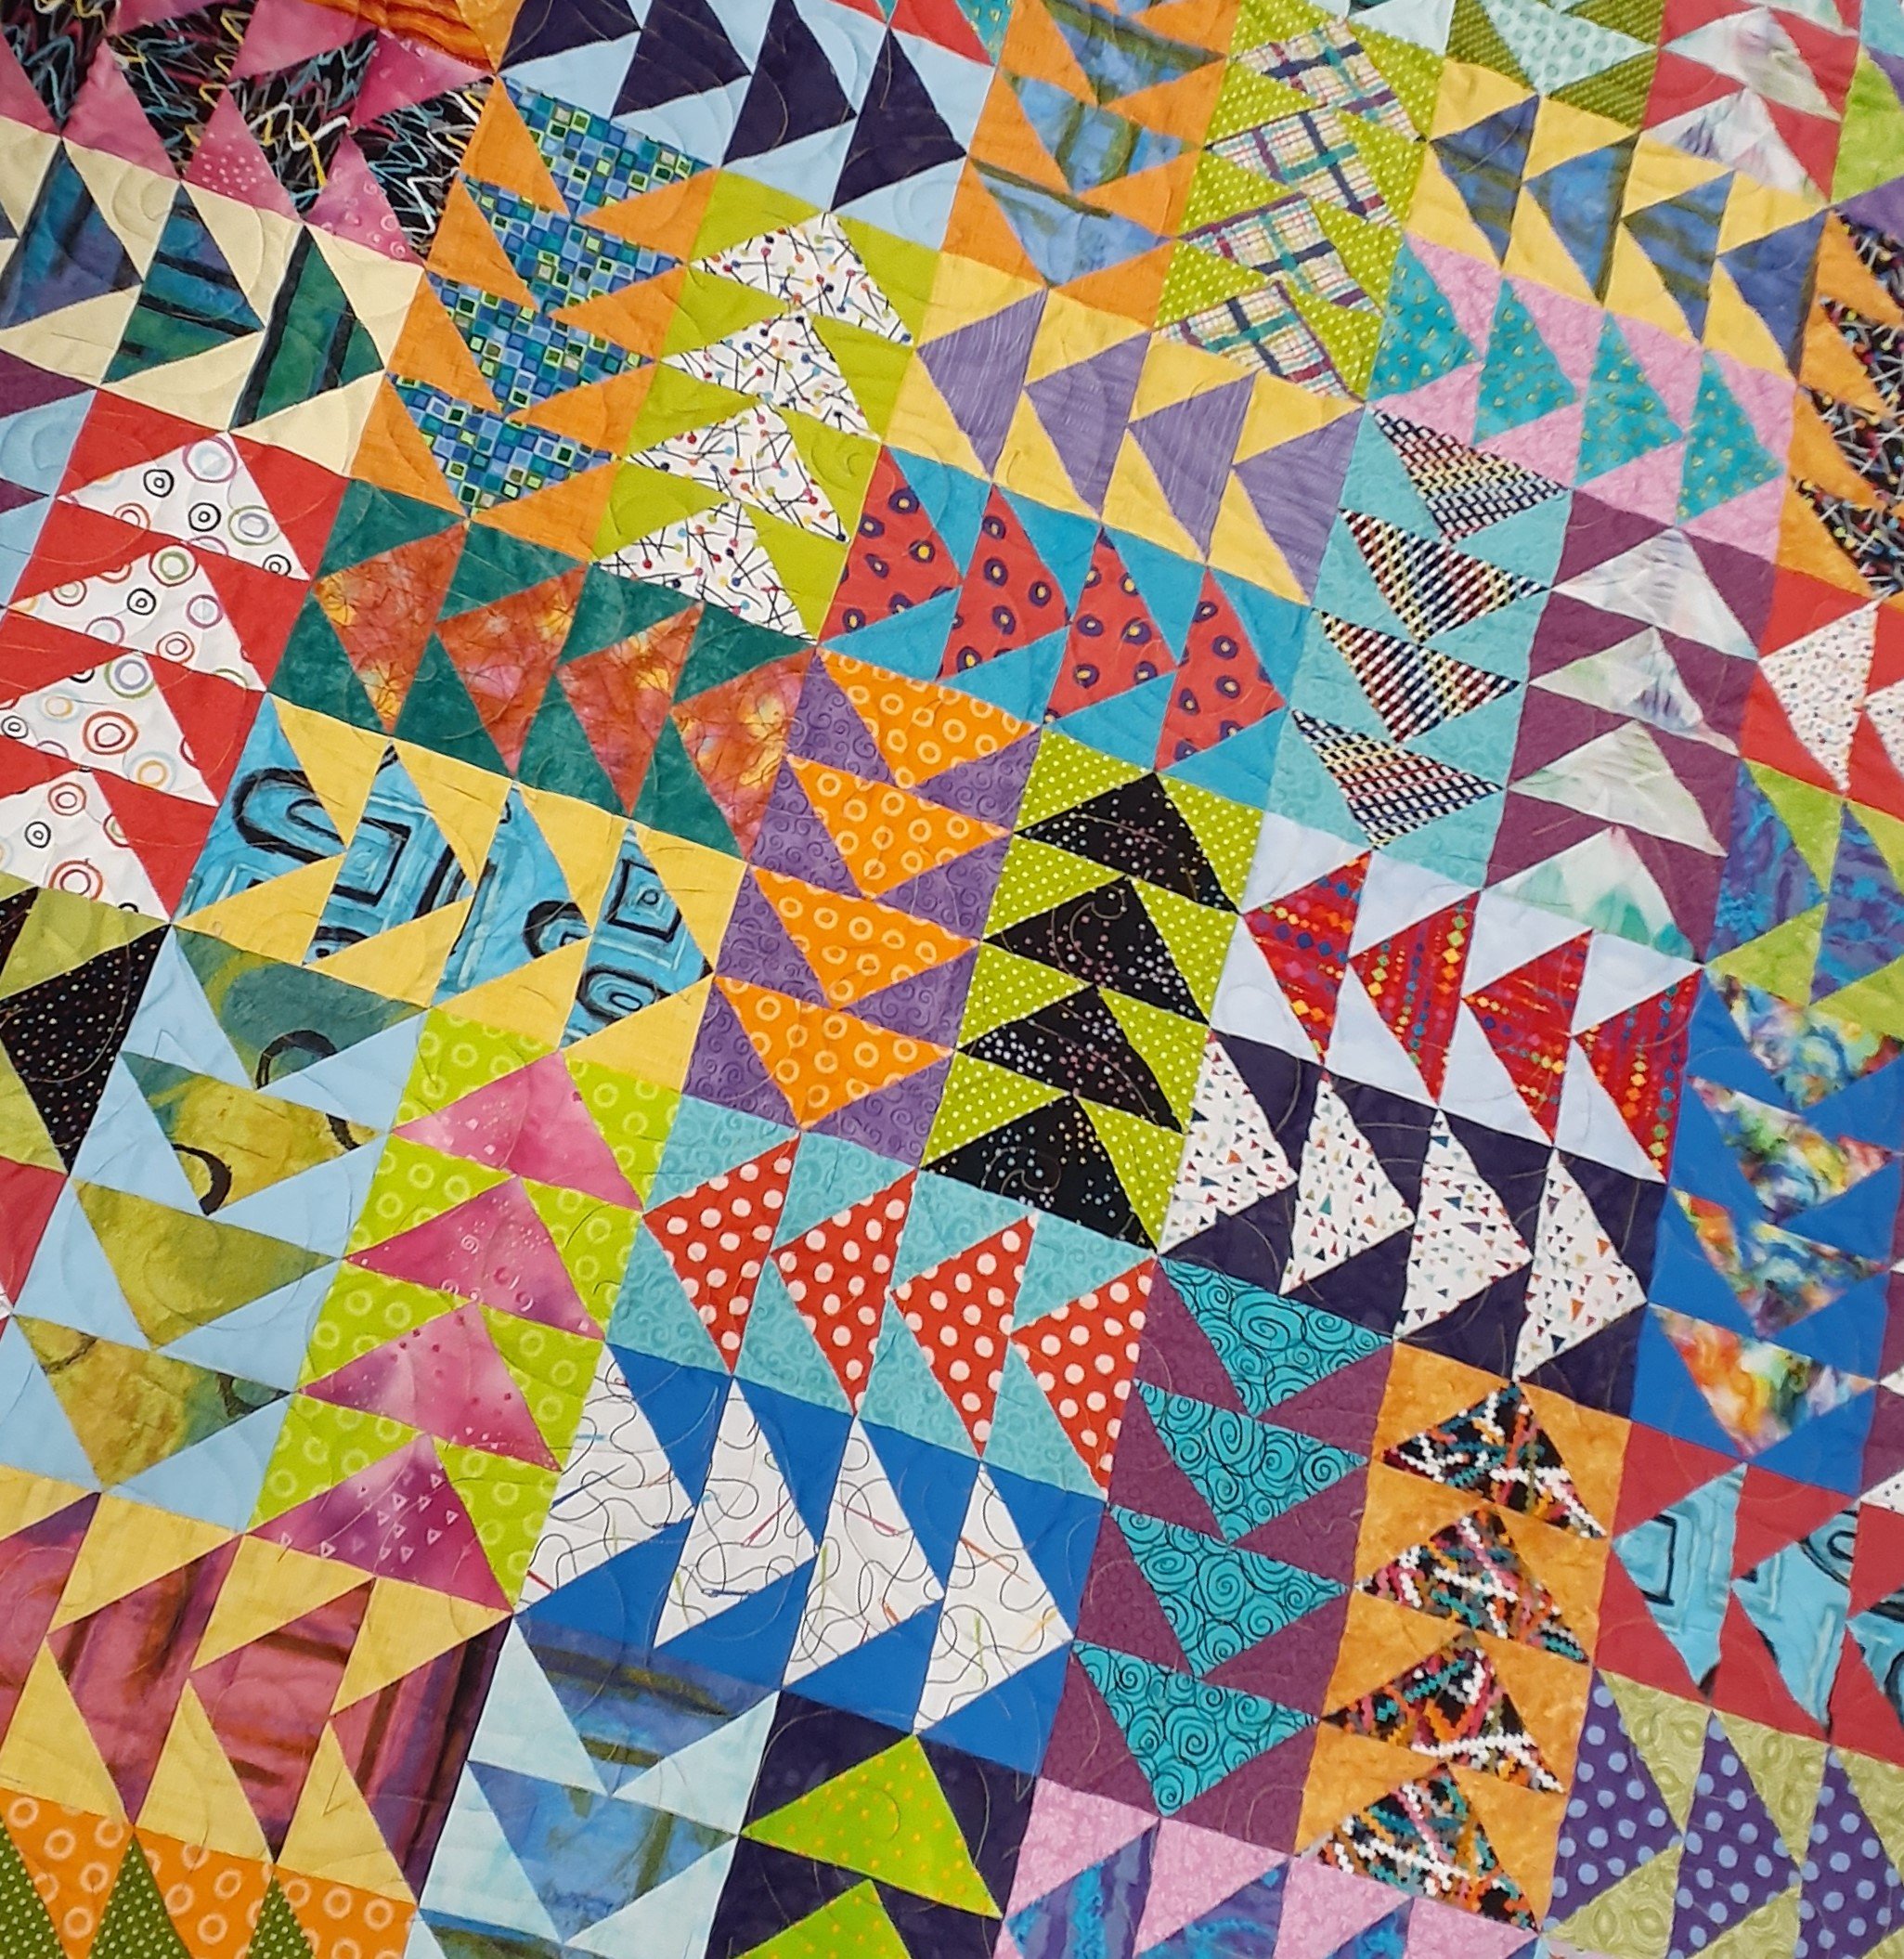
Flying geese are definitely a staple in quilting. They are used in so many traditional and contemporary blocks and there are many ways of making them...and so many tools on the market that make them easier and more accurate. Part 1 shows how to make them with the rulers you already probably own for regular cutting and Part 2 will highlight some specialty rulers made specifically for creating flying geese units.
Below you will see 2 different basic methods that I have personally used. The first is the most basic and is also the first technique I learned when I began quilting,
These do not require a specialty ruler (use one of your existing smaller square or rectangular rulers), but it does require accuracy. This method is great for using up scraps for a colourful mix of geese.
***scroll to the bottom of the page for a printable PDF
Method 1:
This method is perfect for scrappy geese because the units required are quite small and great for emptying the scrap bin. Remember that all the “sky” squares do not need to be identical. Think about making all the “geese” dark colours and all the “sky” light colours, or vice versa.
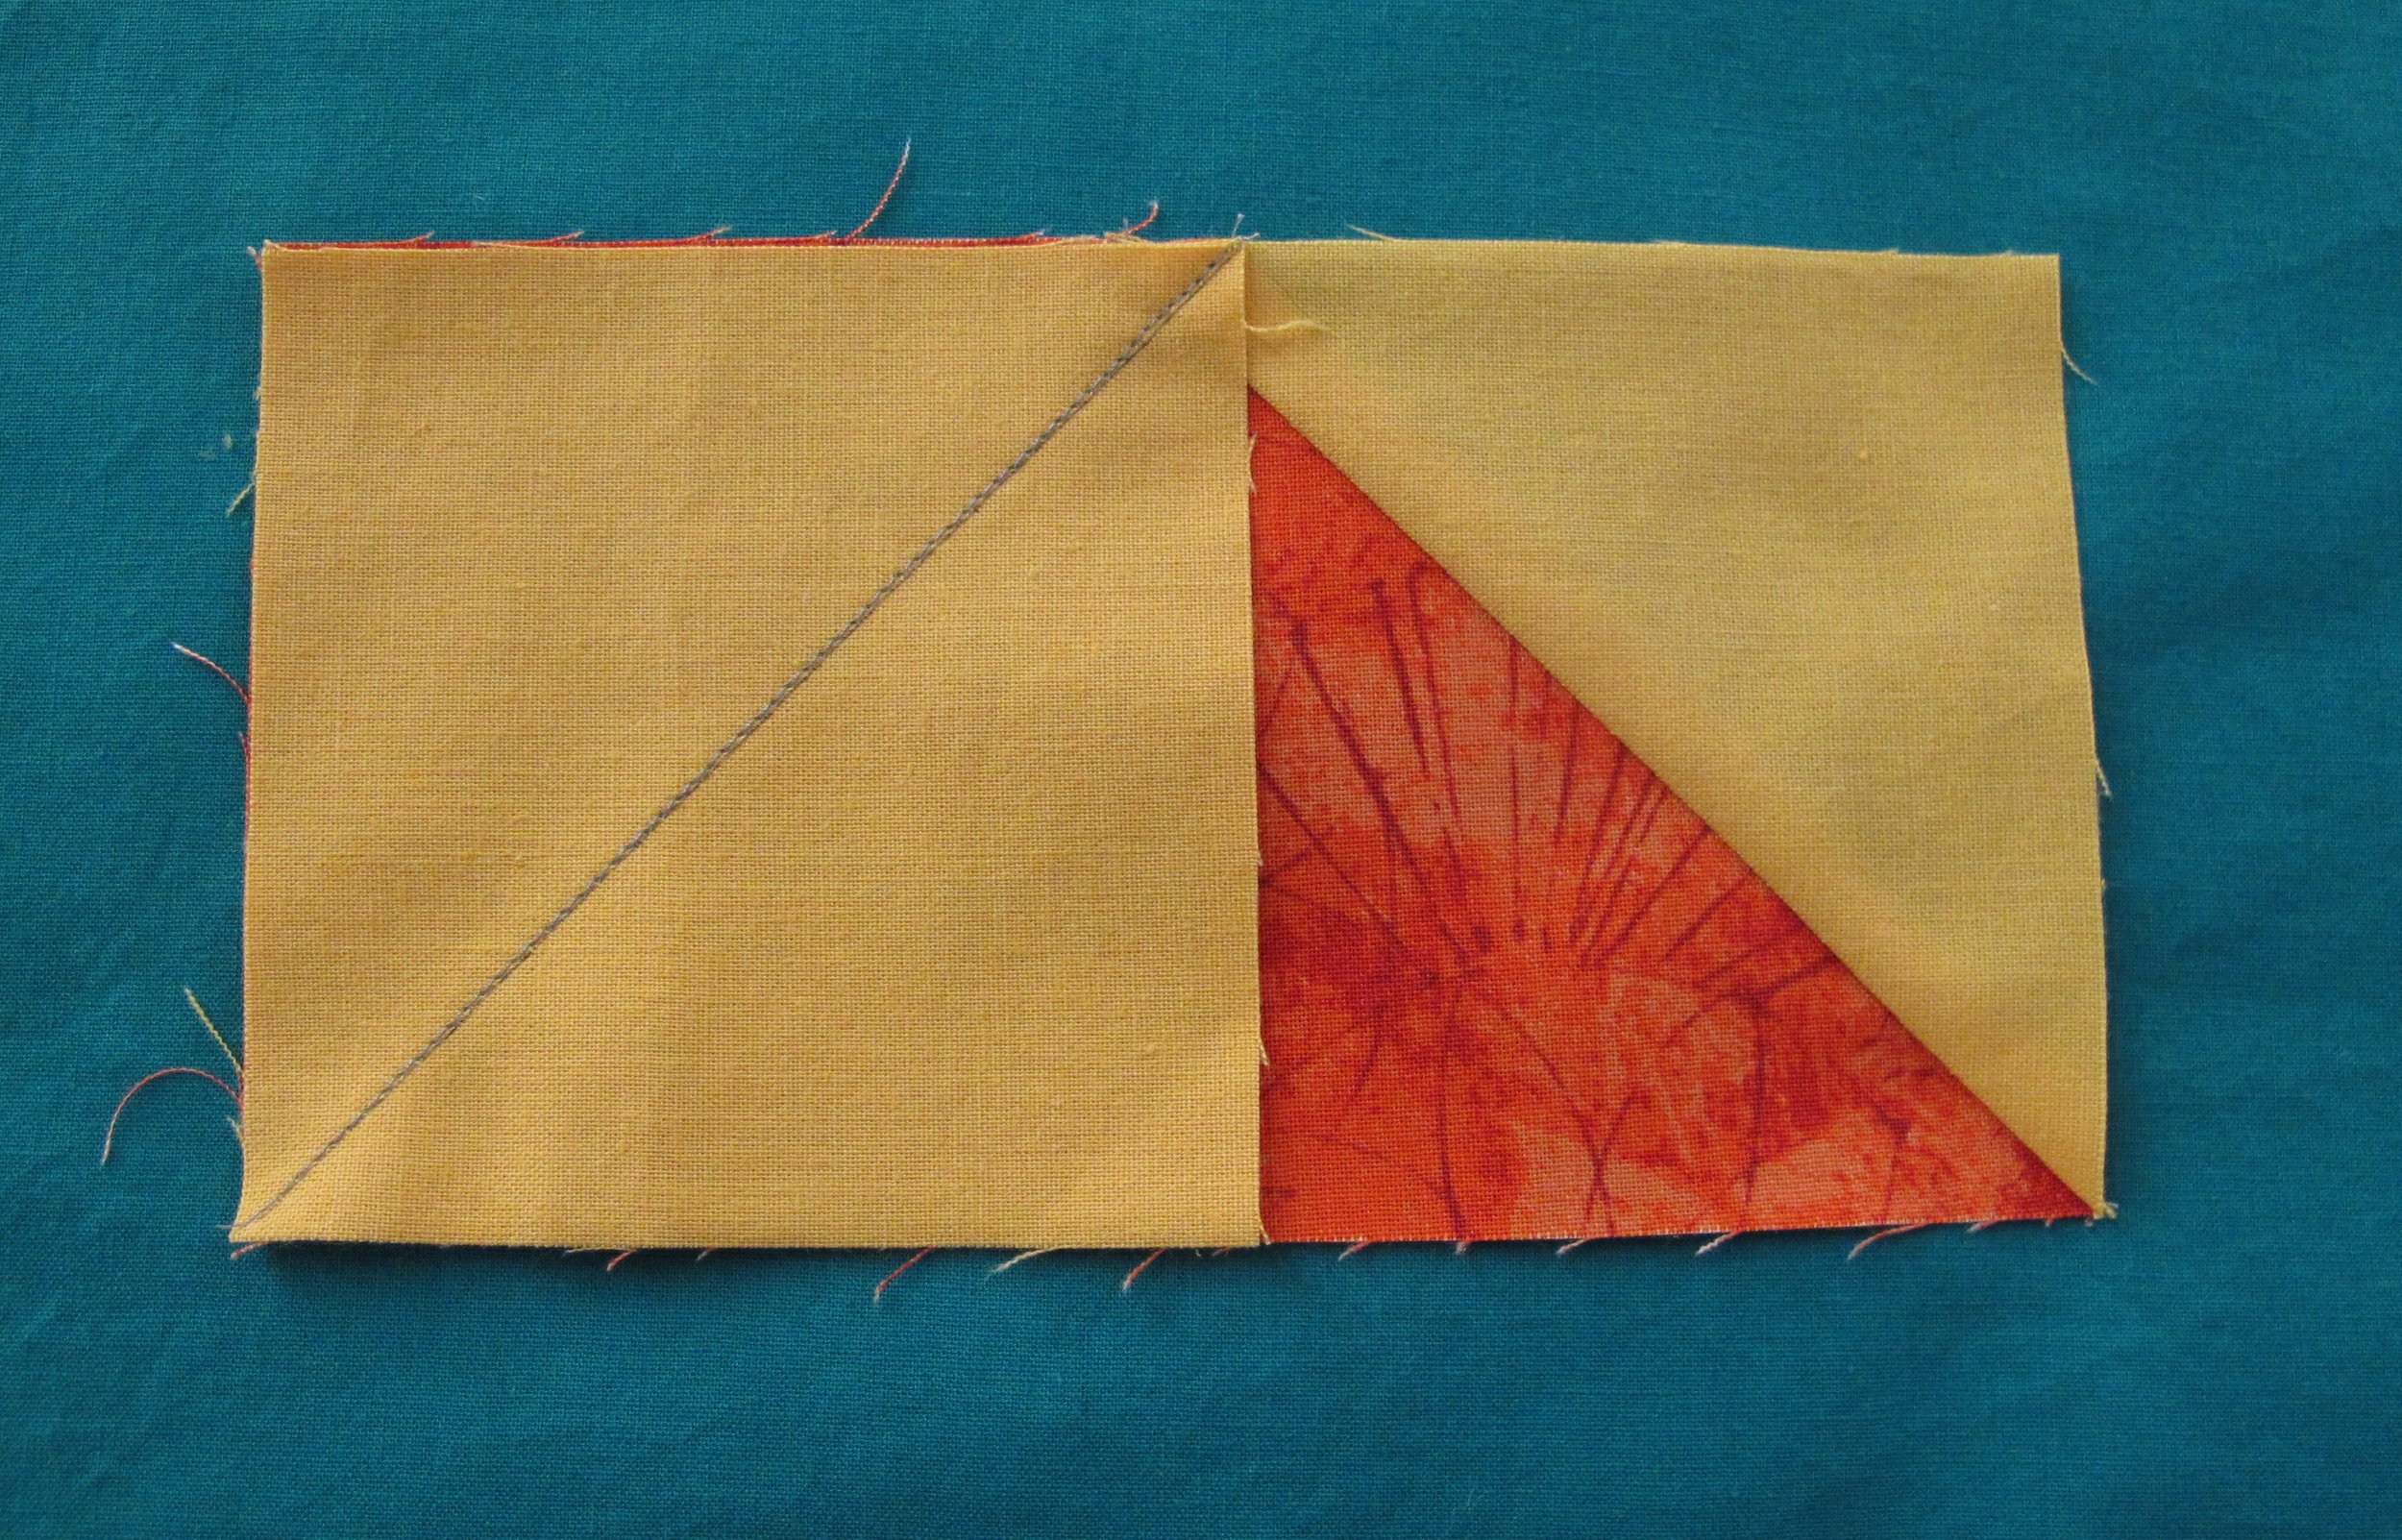
Determine what size of “goose” you want to make. For demonstration purposes the goose I made finishes at 3” x 6”. Taking into account ¼” seam allowances we need two 3 ½” squares (for what I call the “sky”) and one 3 ½” x 6 ½” rectangle (the large triangle body of the “goose”). Always add ½” to whatever size you wish to make. For instance, a goose that finishes at 4” x 8” will need two 4 ½” squares and one 4 ½” x 8 ½” rectangle, and a goose that finishes at 2 ½” x 5” will need two 3” squares and one 3” x 5 ½” rectangle.
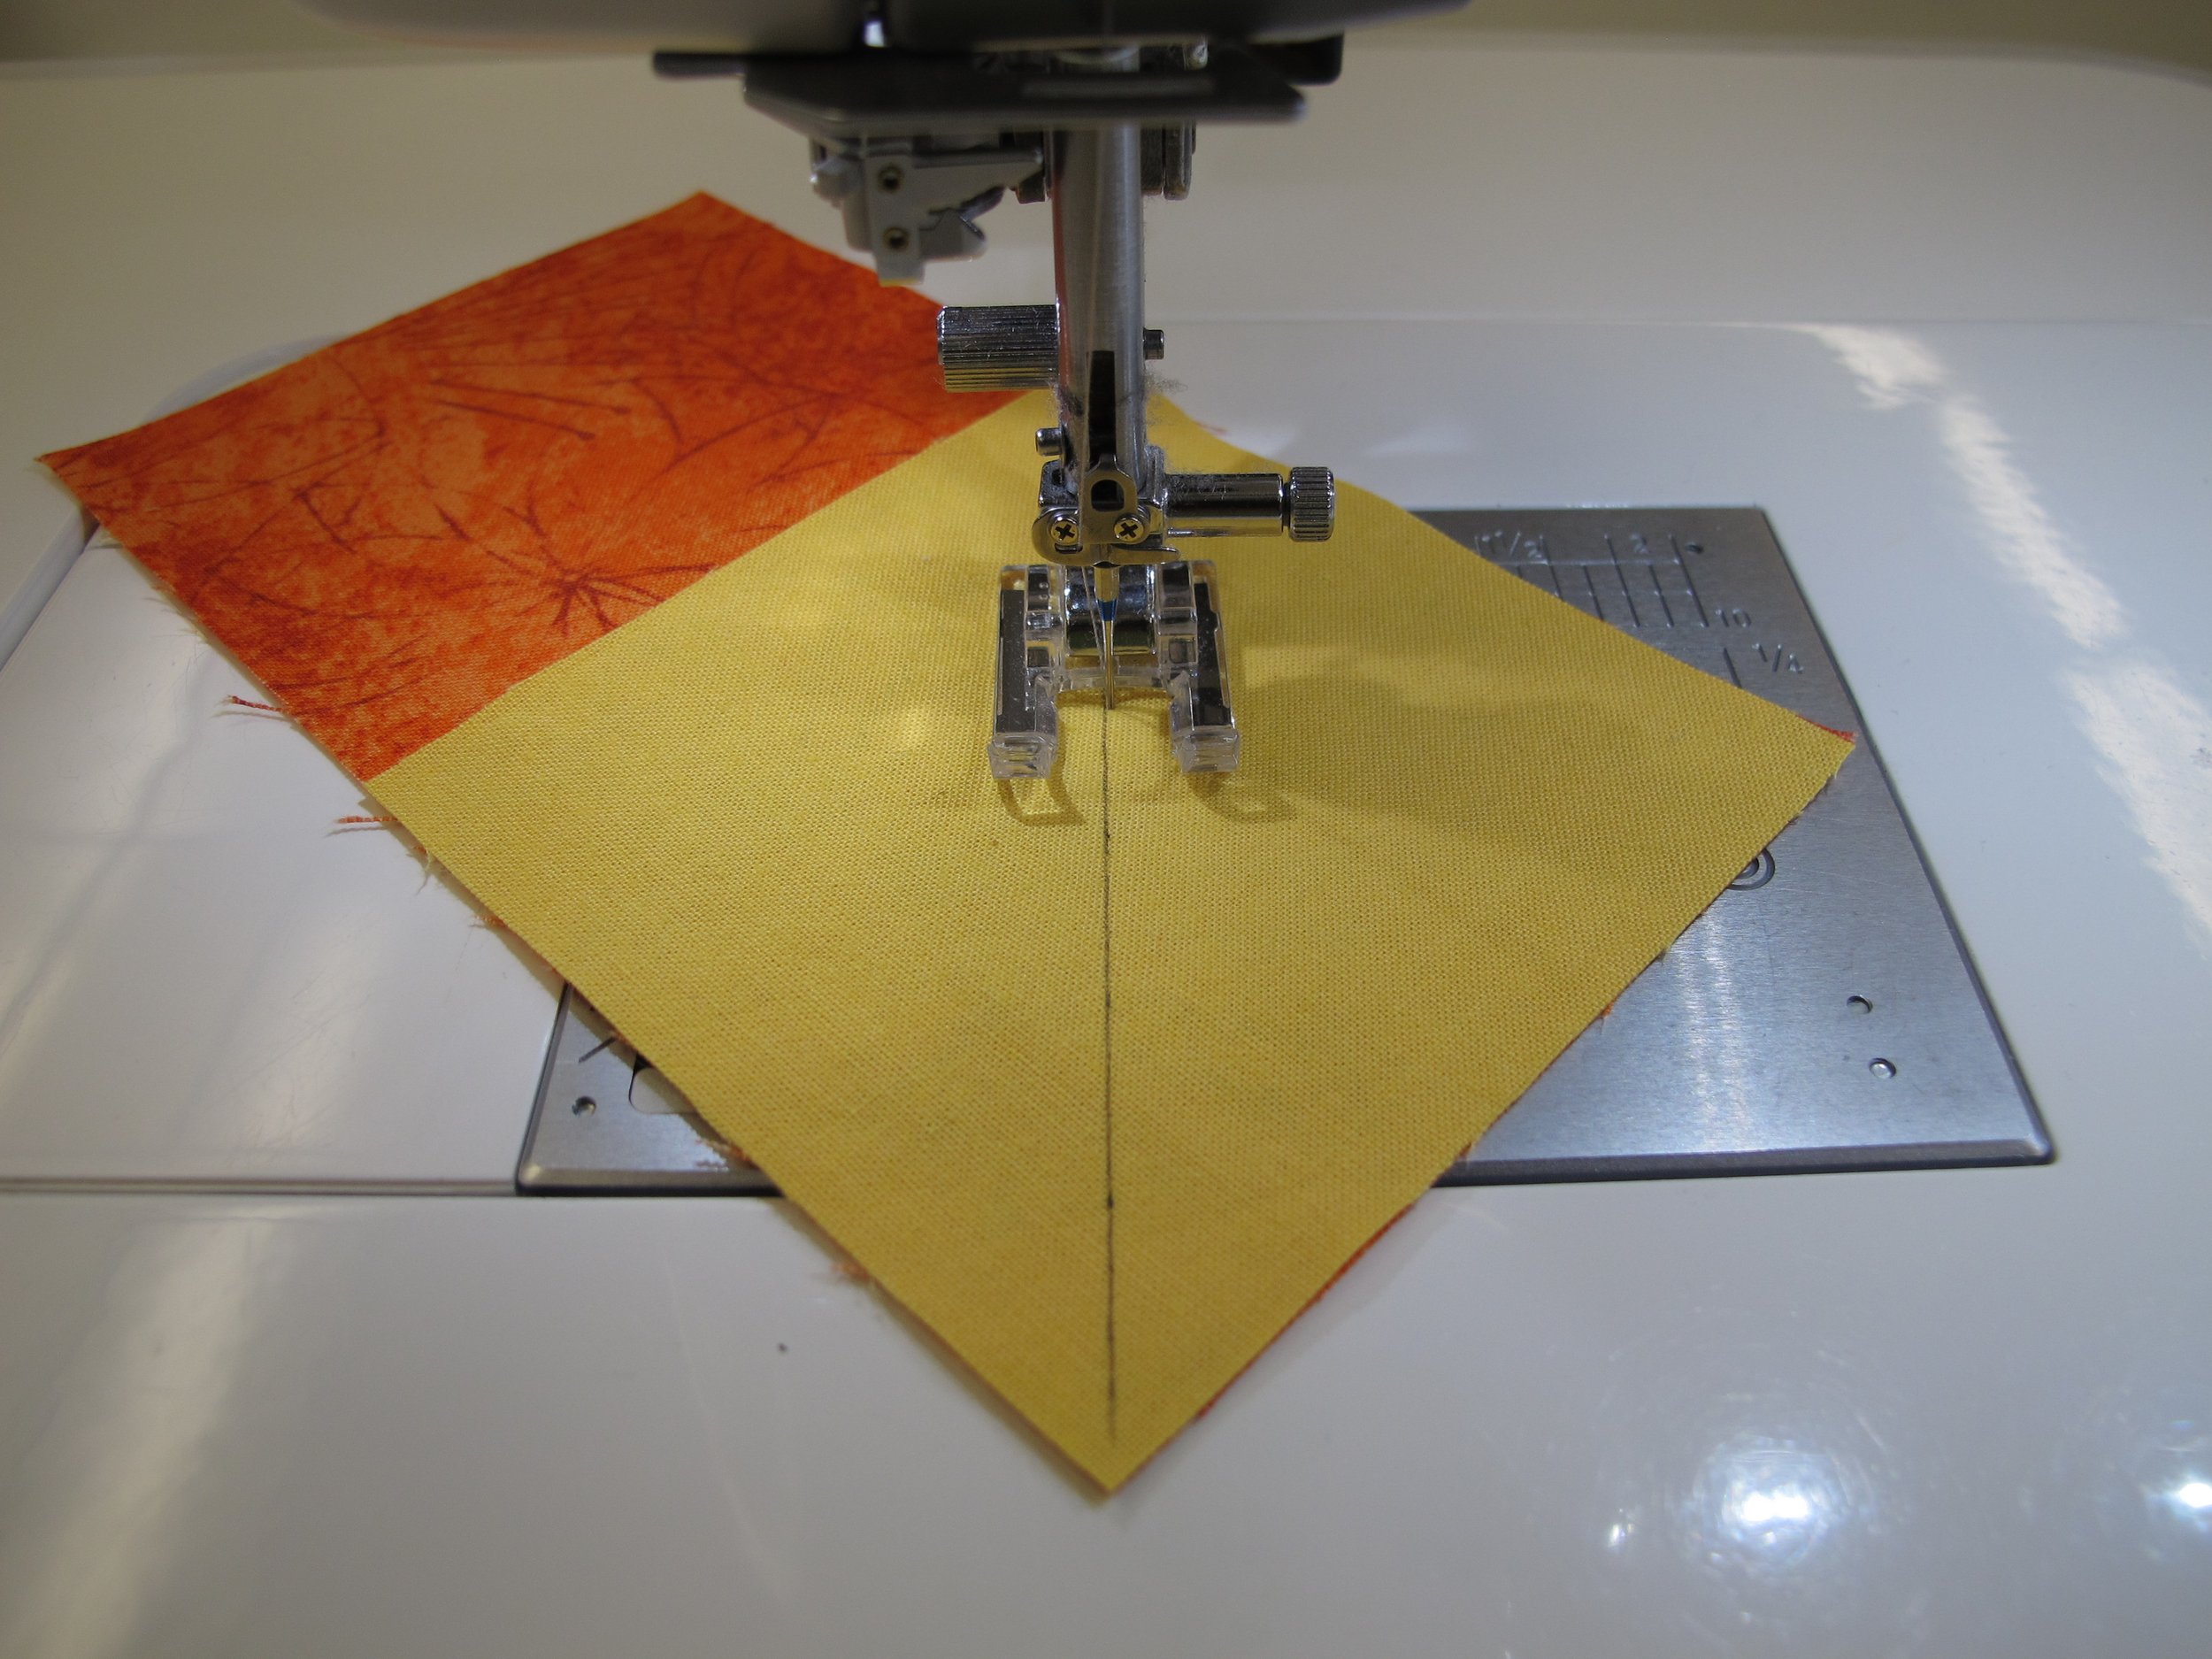
Draw a diagonal line on the wrong side of each square. Place one square on one end of the rectangle as shown. Do not stitch directly on the line. Stitch just one needle width to the side closest to the corner. This takes into account the bulk from the thread so that when it is pressed to the corner it goes all the way to the corner making it more accurate. If the stitching is right on the line the triangle does not always reach the corner making it an undersized block.
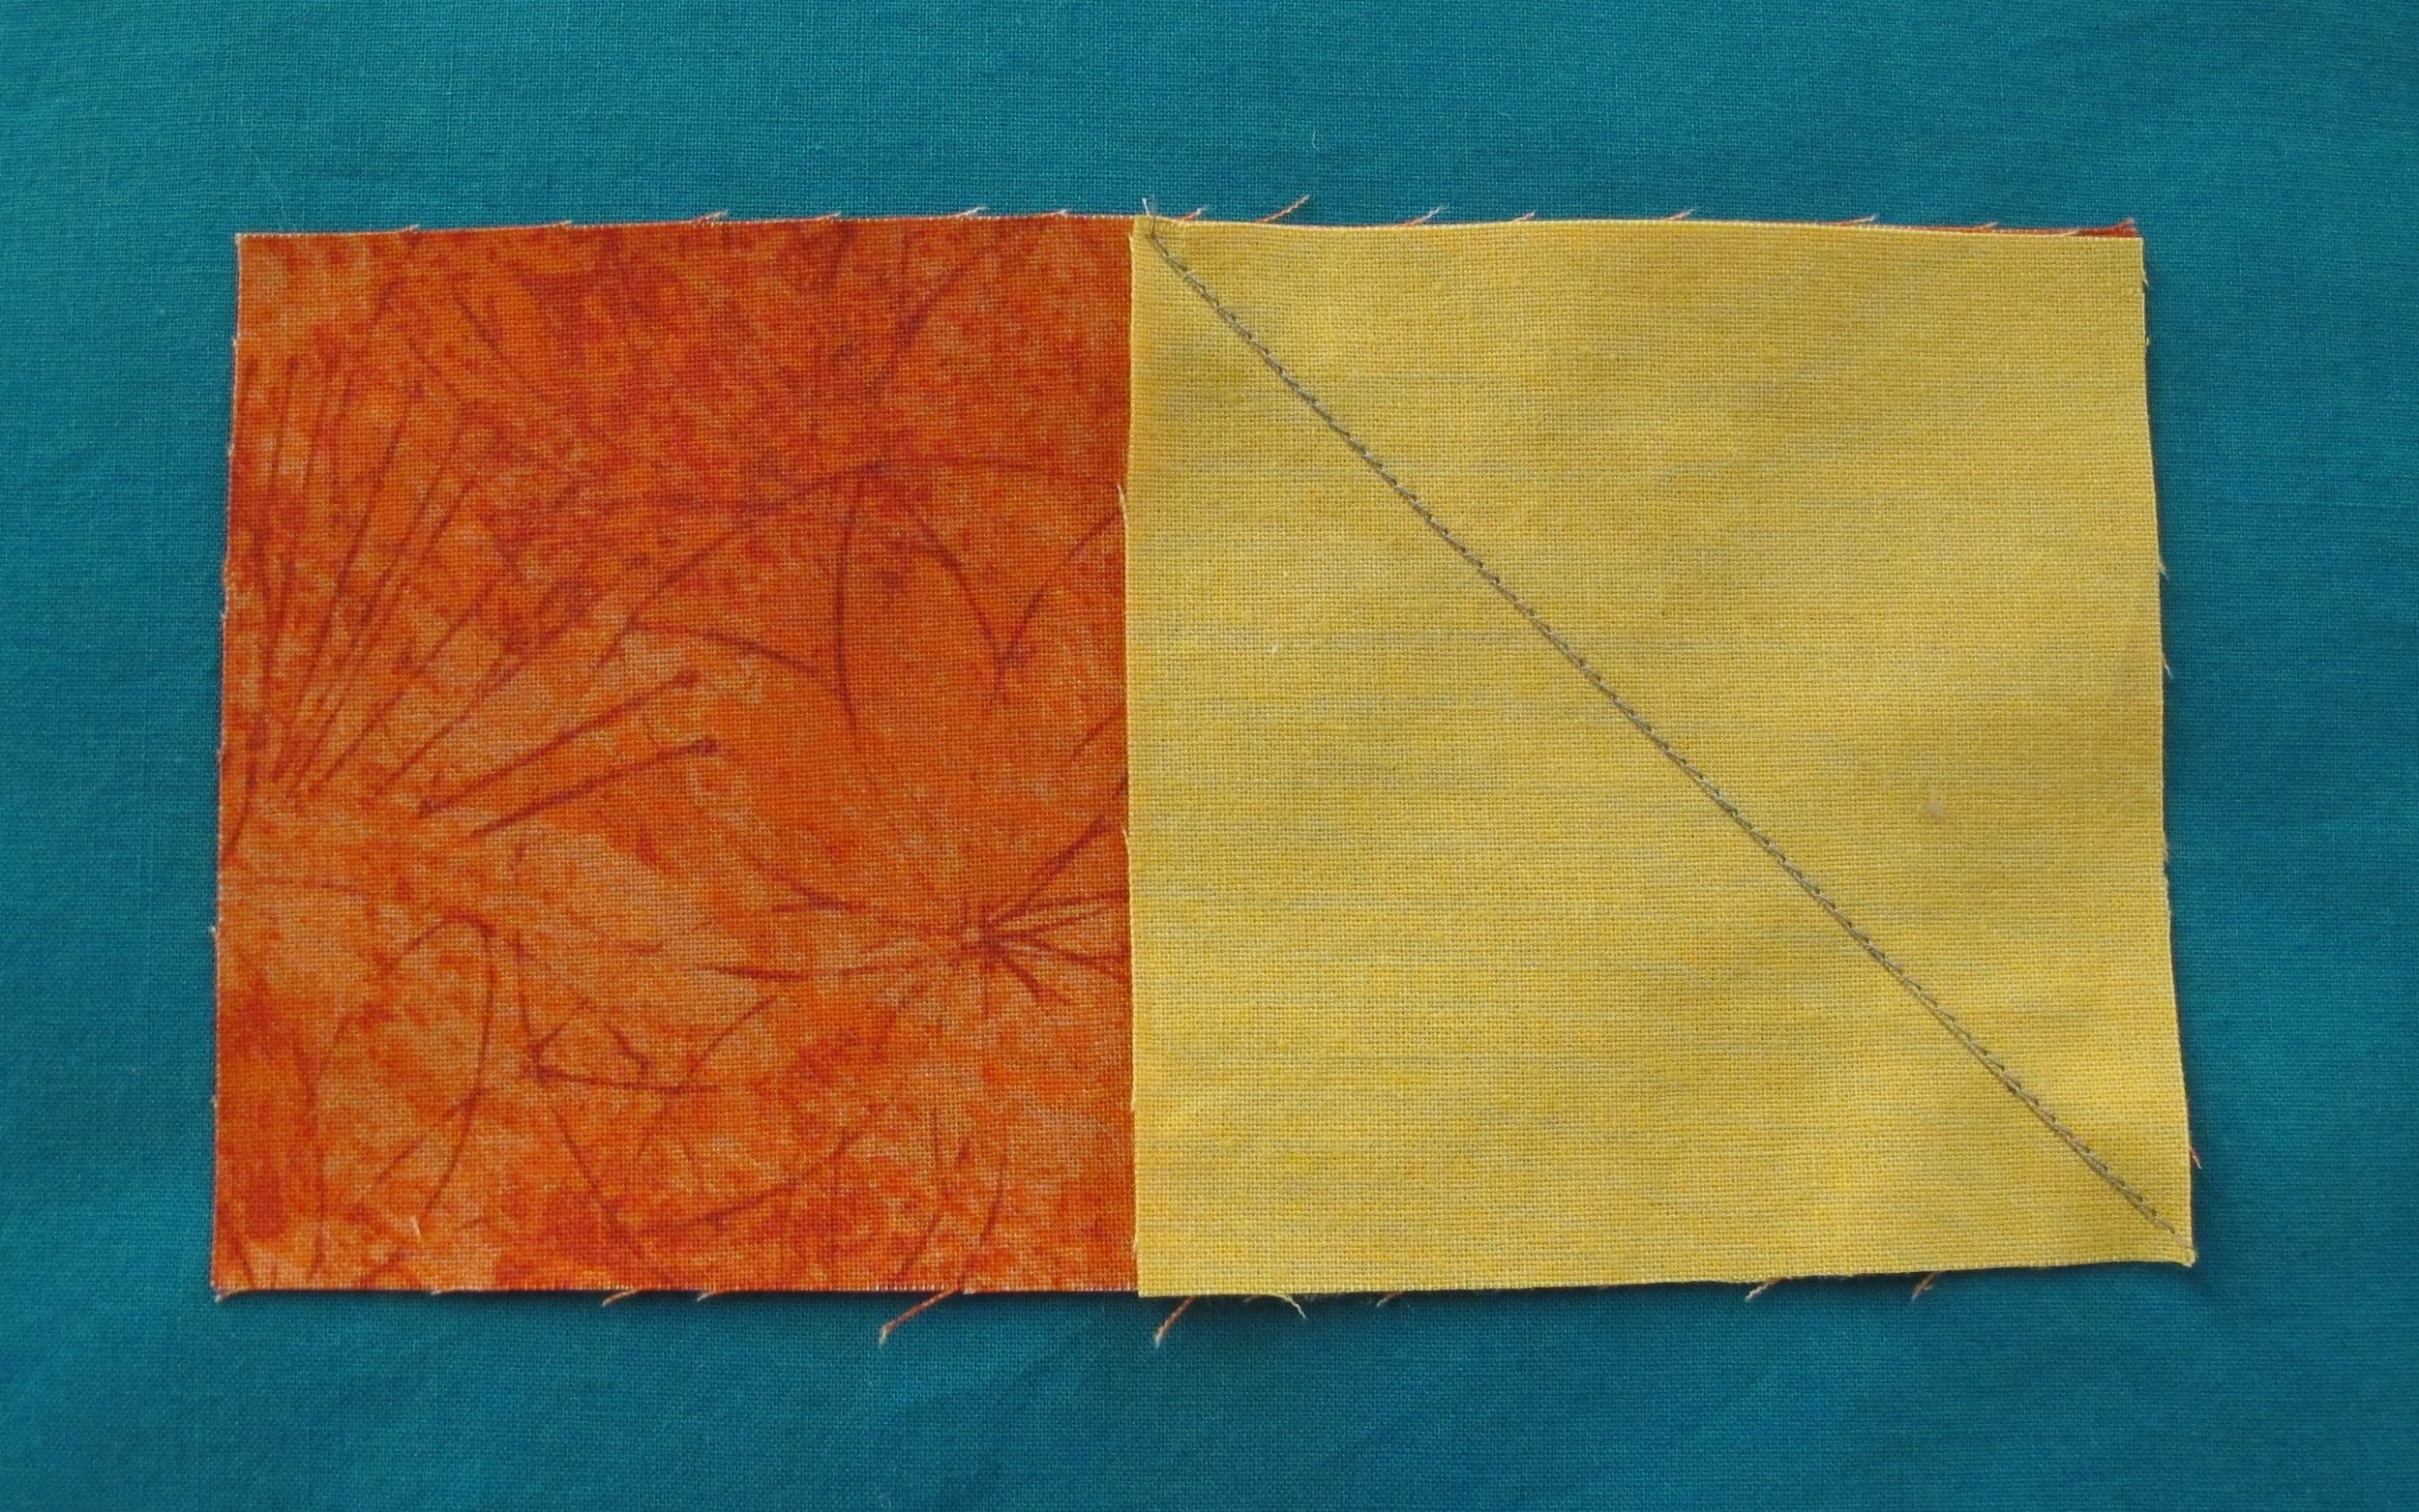
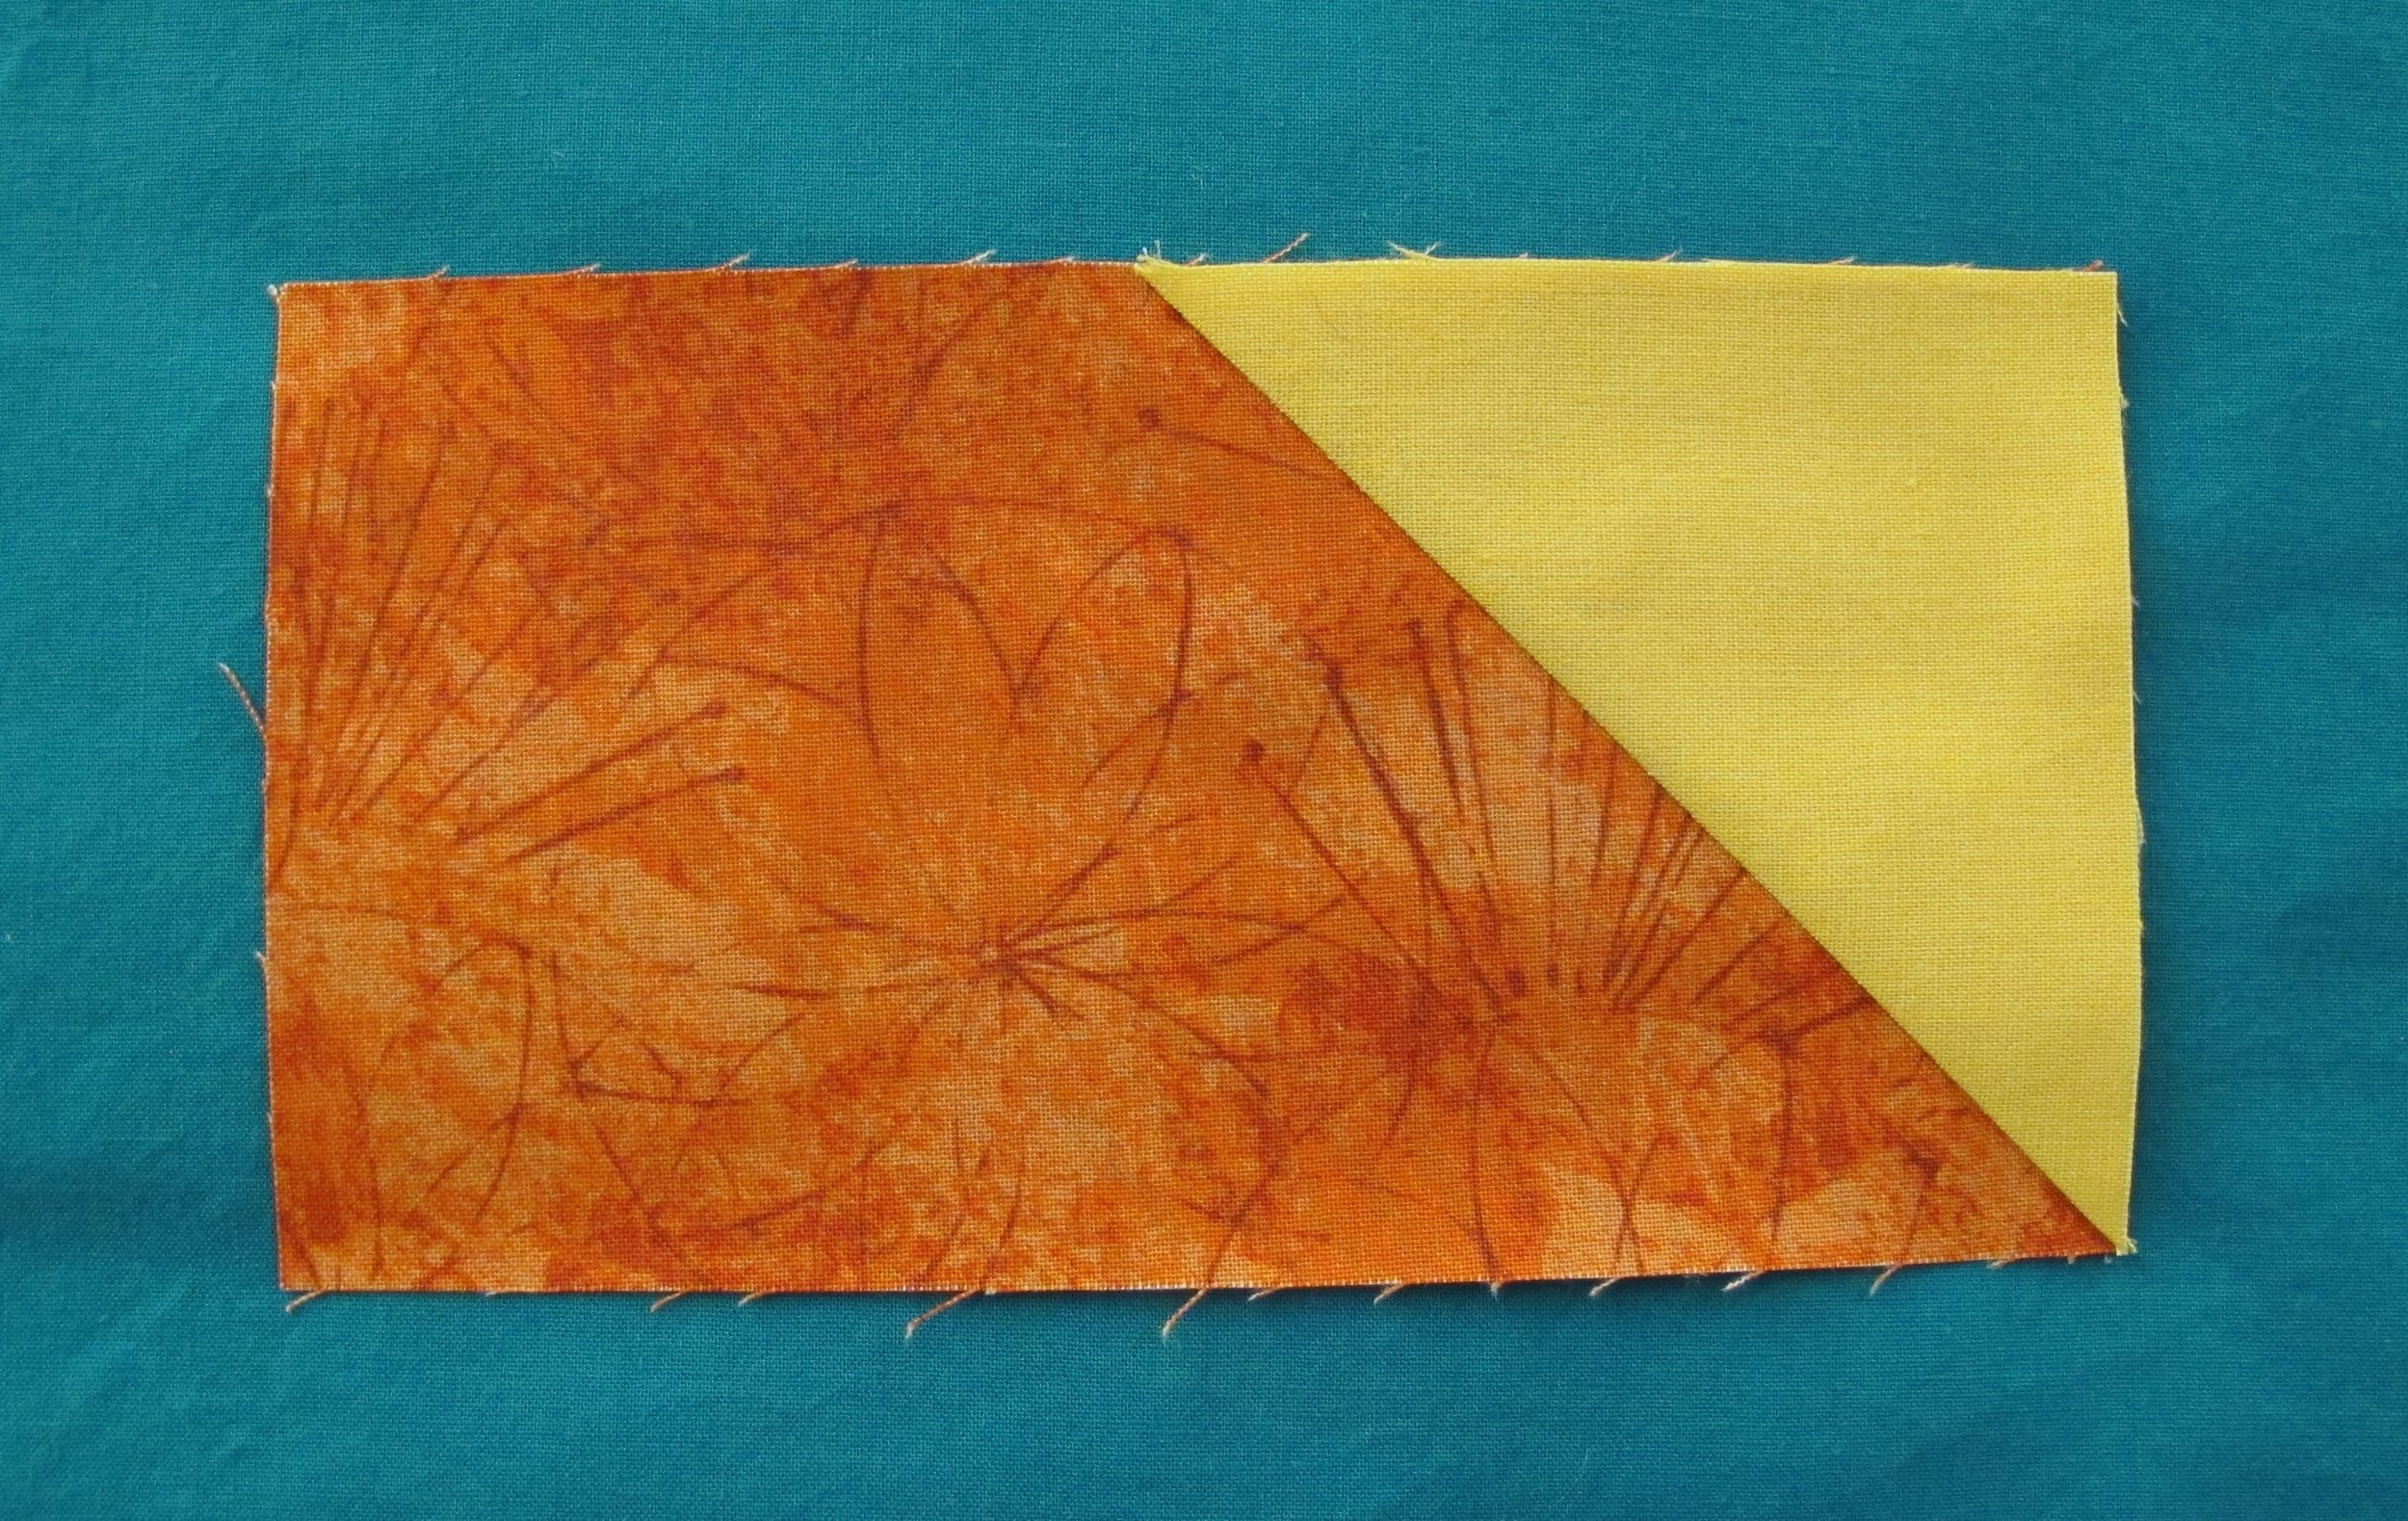
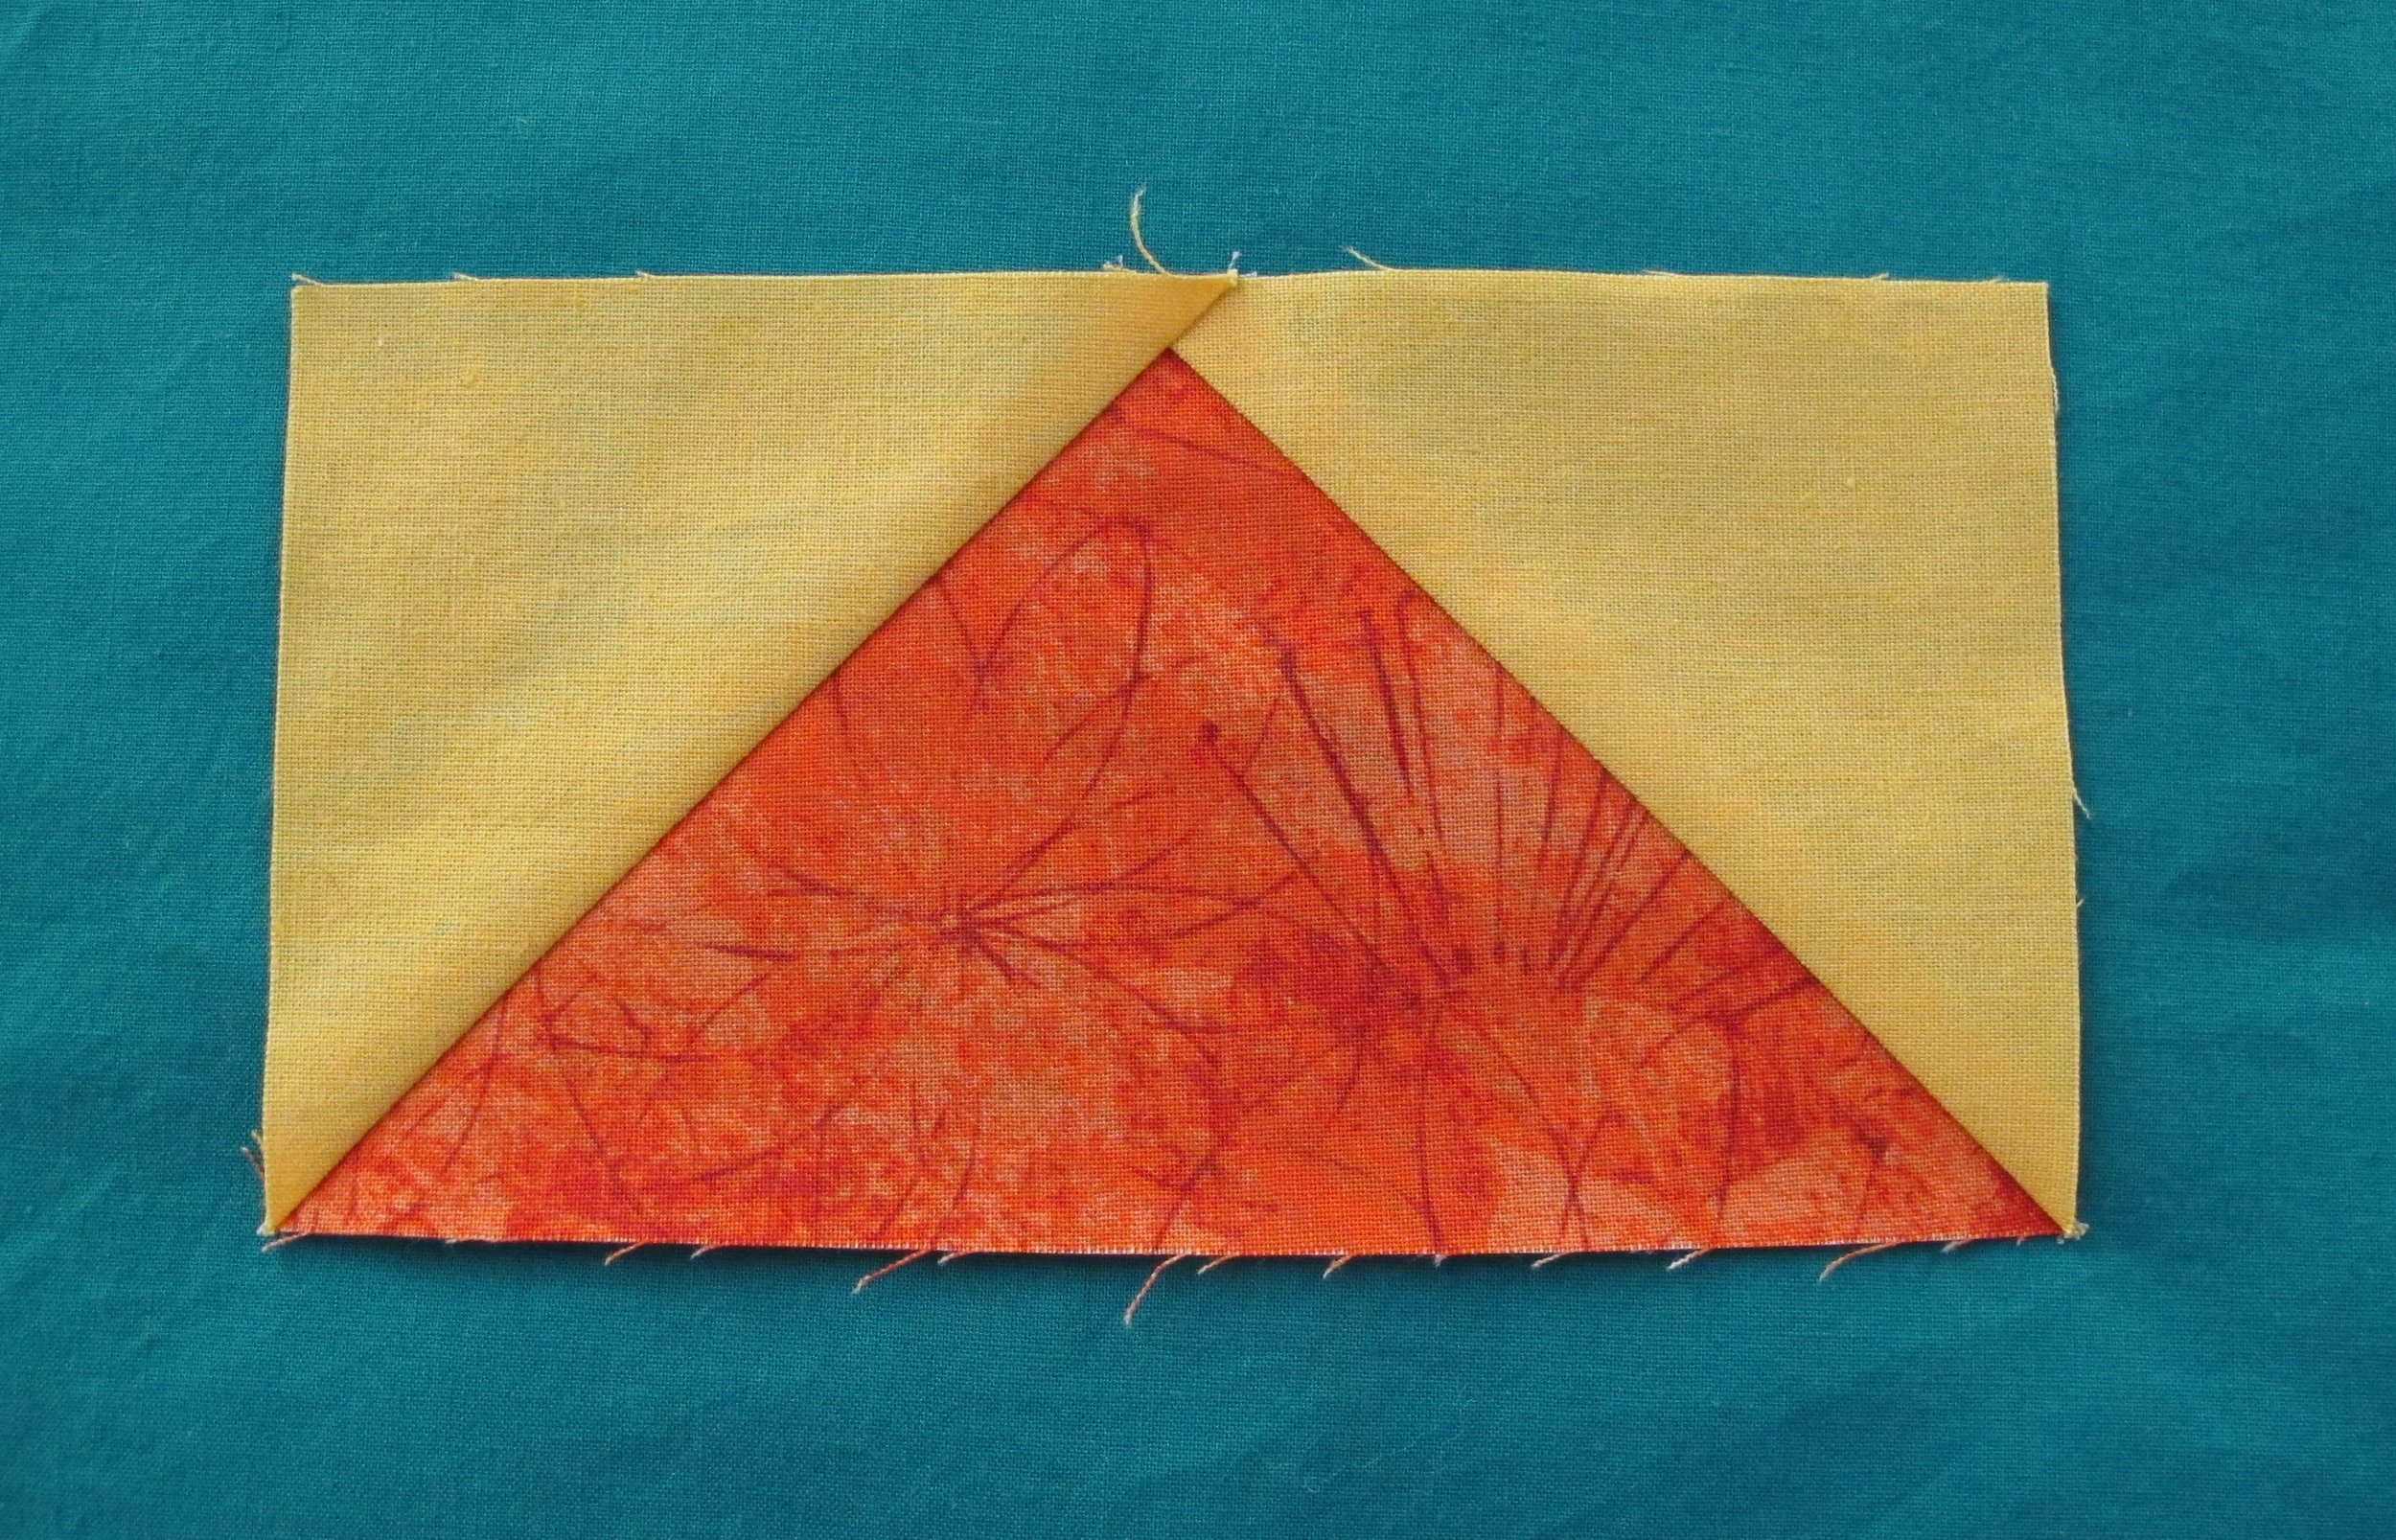
Press the seam allowance towards the corner and trim to ¼”. Place the other square on the opposite corner and repeat. One goose is now complete.
Method 2:
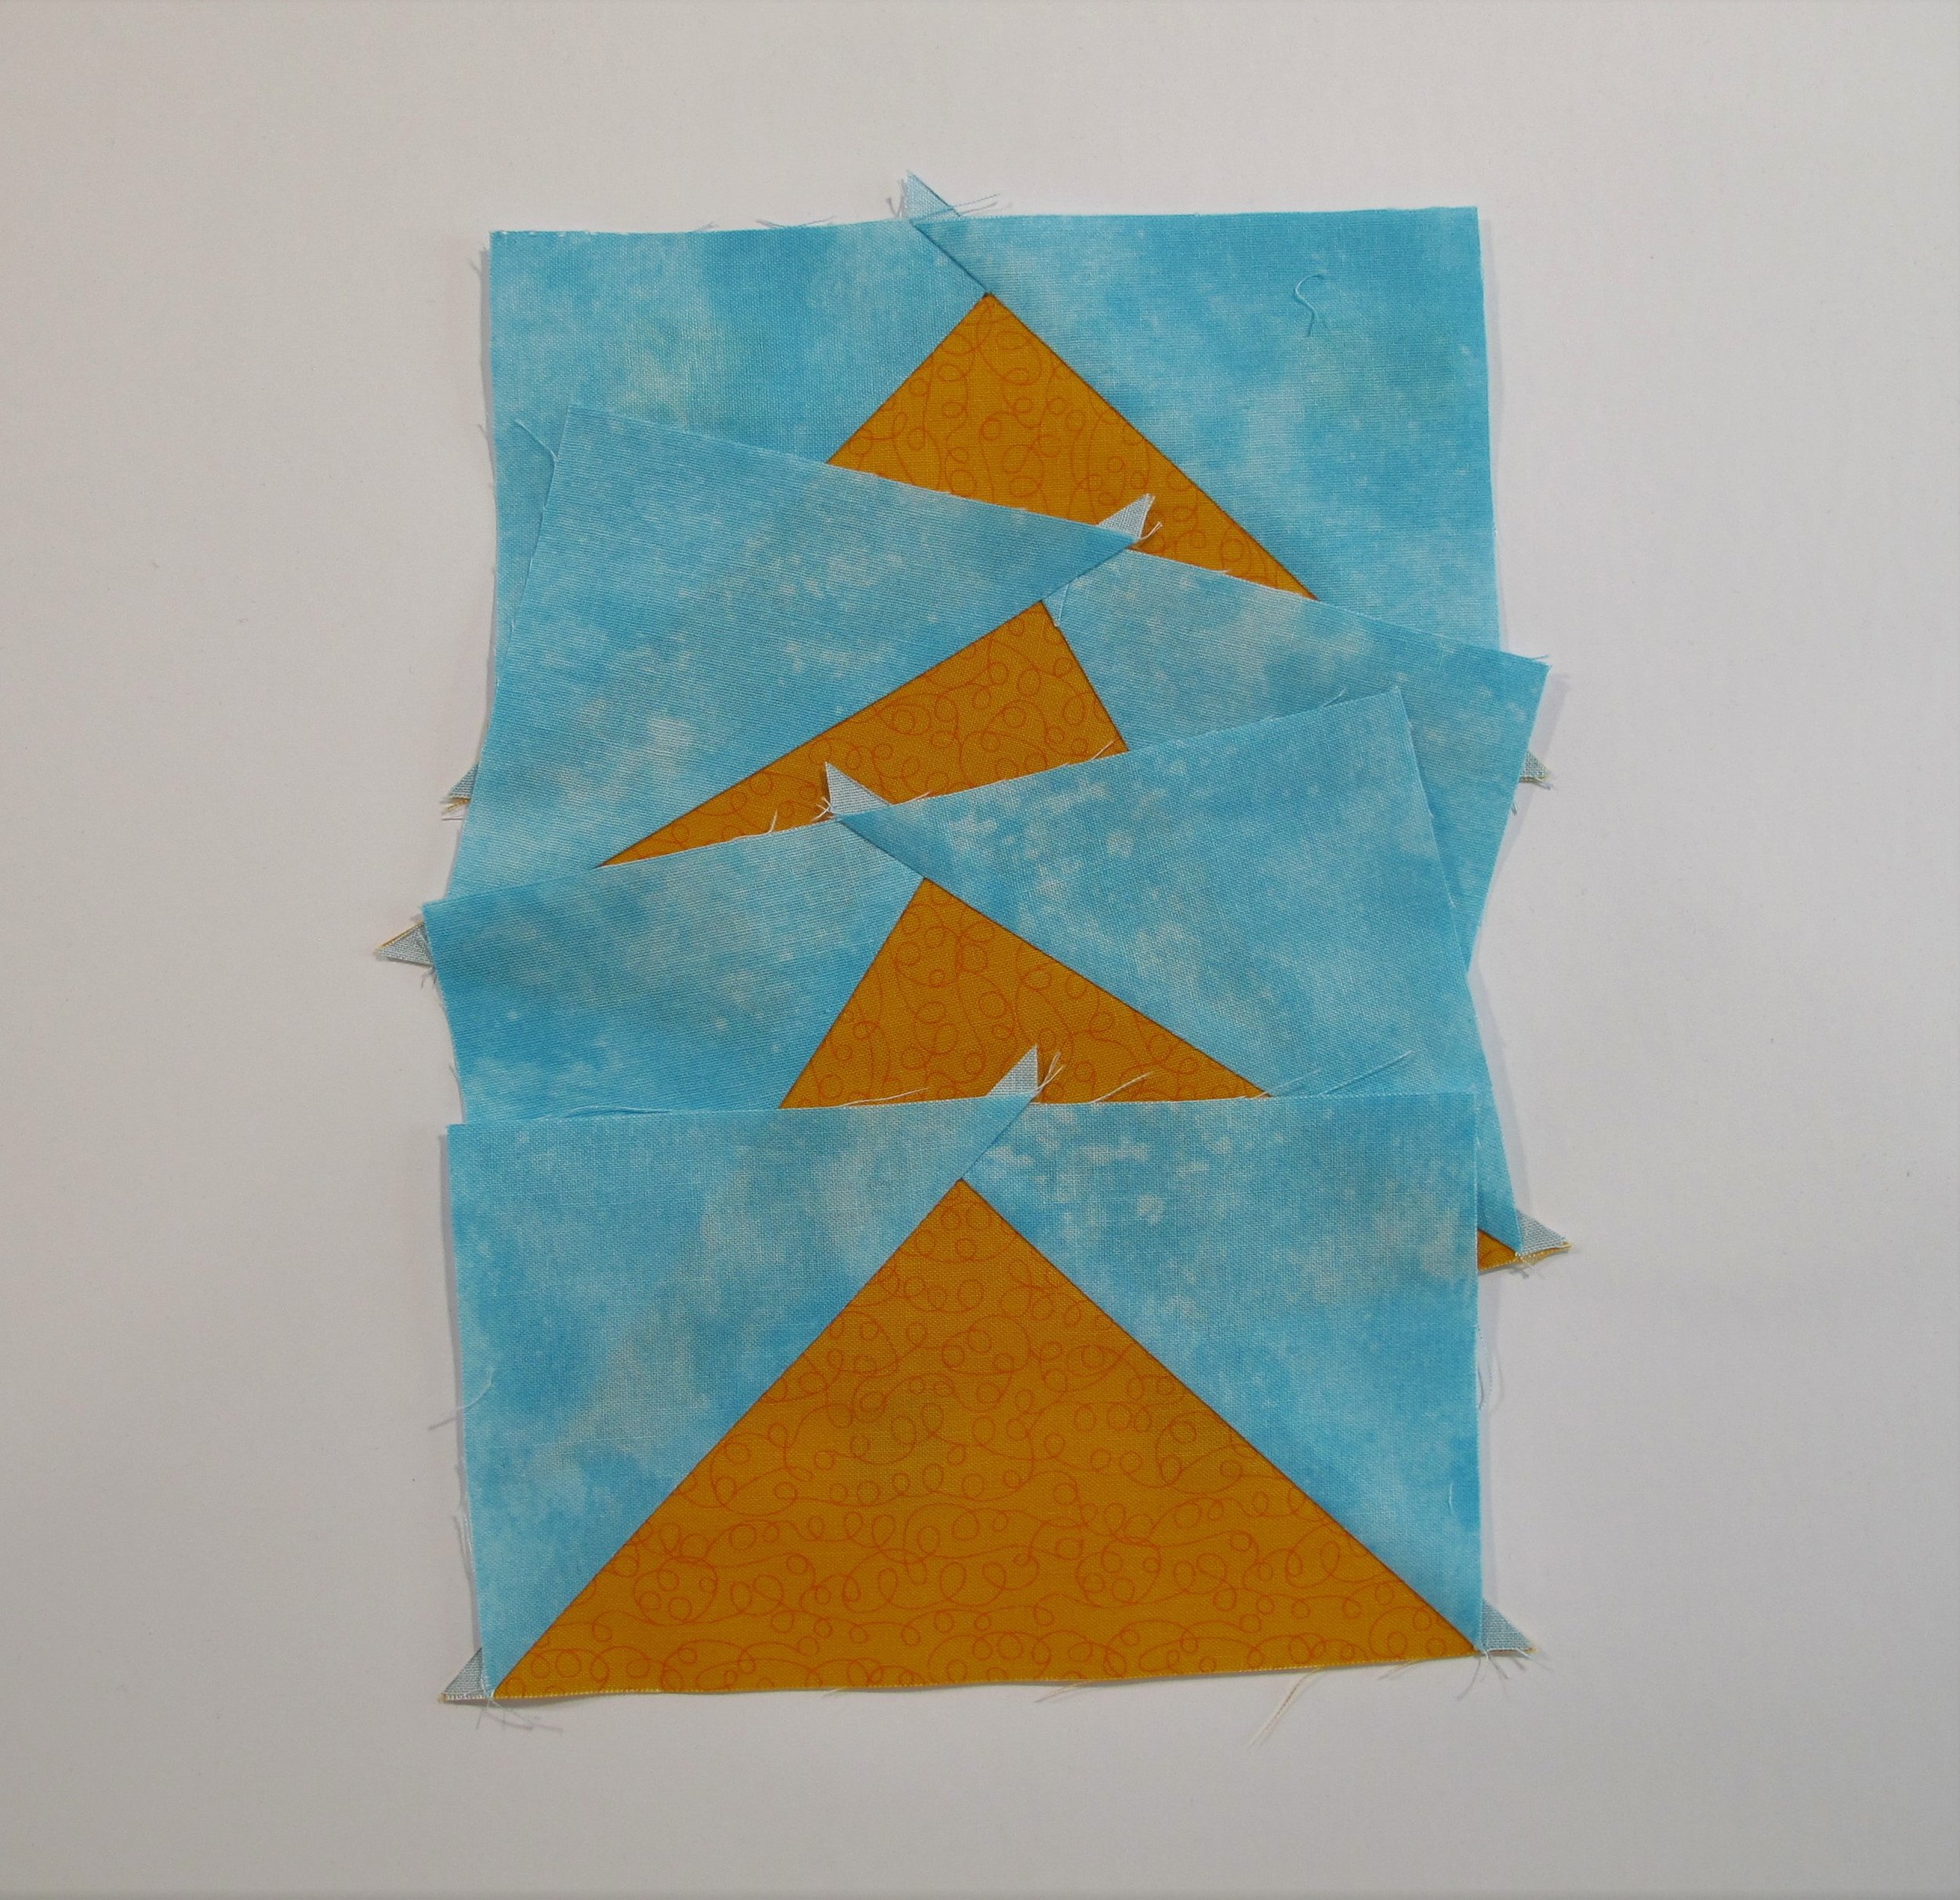
This is what is called the “heart” method. I like to make these slightly larger than needed so that I can trim accurately afterwards. Julie from The Crafty Quilter has a wonderful cutting chart for flying geese...she's taken all the guesswork out of figuring out what size squares to use for the finished size you need. Don’t tell her, but I think she’s a little cray-cray for even bothering to put cutting instructions for a finished goose of ½” x 1”!
To make a finished goose of 3” x 6” I cut the “goose” fabric from one 7 ½” square and cut four 4 ¼” squares of the “sky” fabric. This yields four complete geese.
Draw a diagonal line on the wrong side of each small square. Place them adjacent to each other diagonally on the larger square as shown below. Yes, the small squares do overlap a bit. Stitch ¼” away on both sides of the line. Cut along the line and press seam allowances toward the “sky”. Now you can see why it's called the heart method.


Place the 2 remaining small squares on top of the heart units as shown below, stitch ¼” away on both sides of the line, cut along the line and press seams toward the “sky”. Now you have 4 geese.

Trimming:
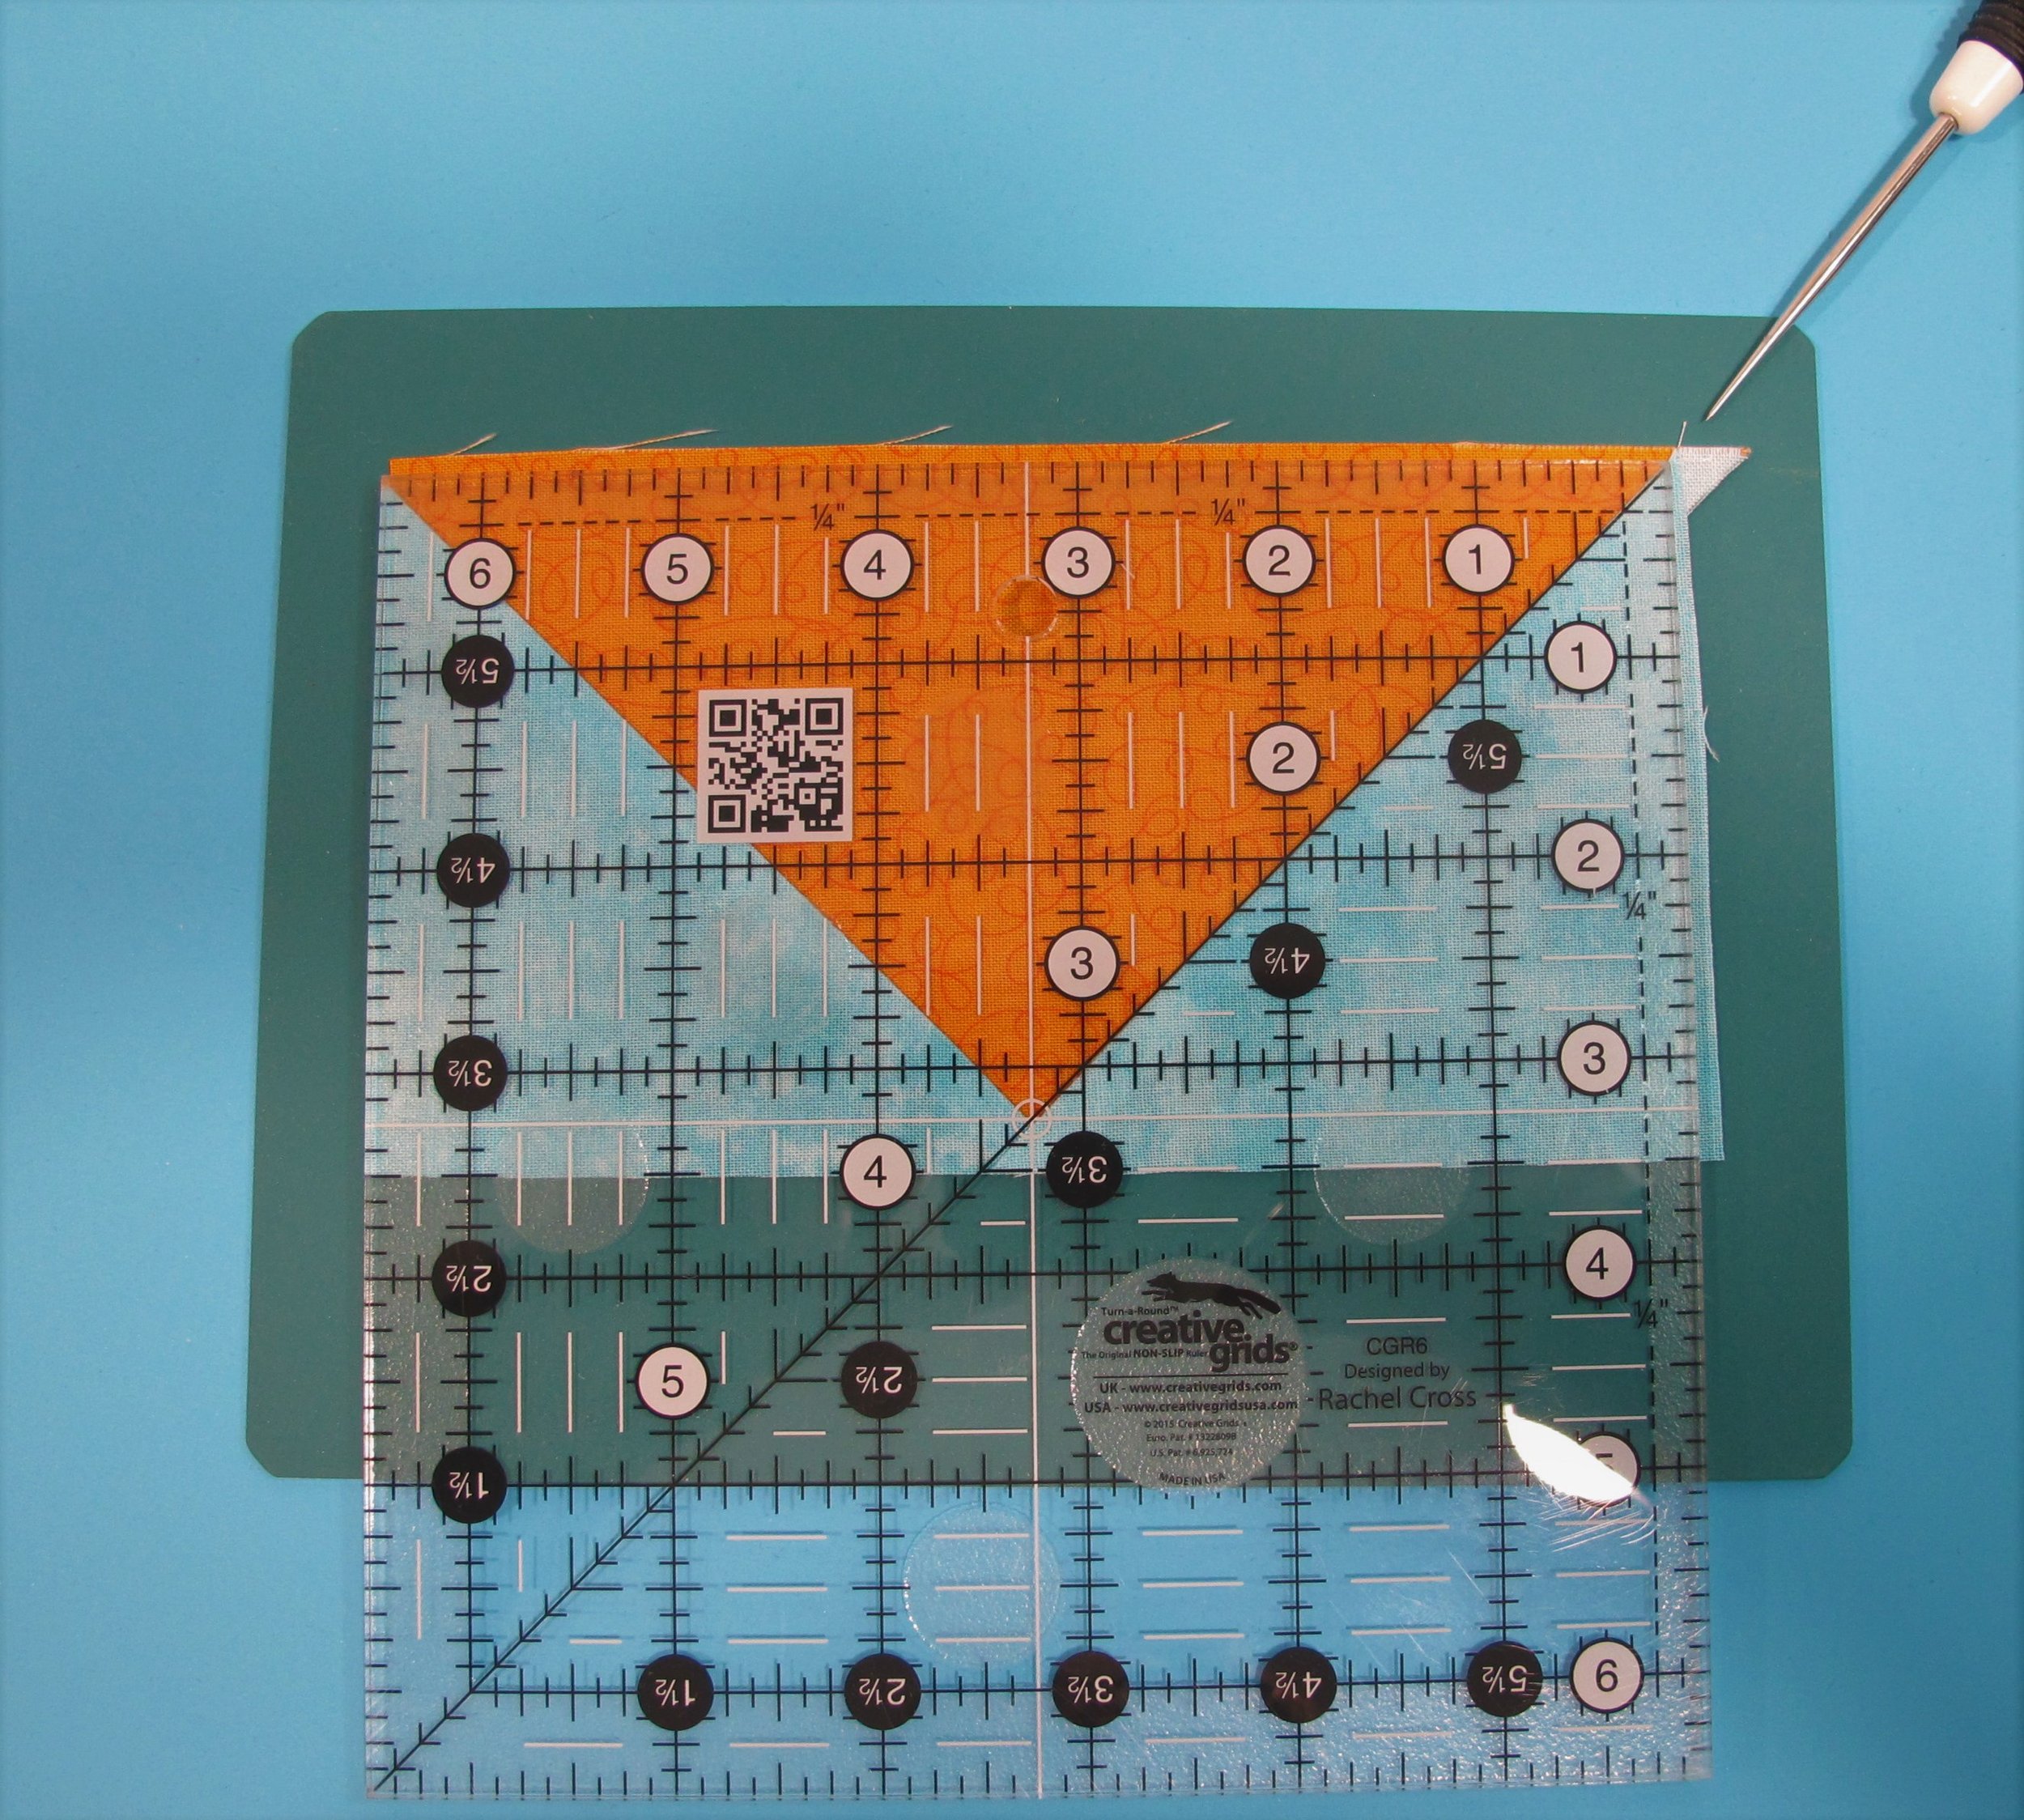
The trimmed unit in this example should measure 3 ½” x 6 ½”. This takes into account the ¼” seam allowance. When trimming these units it's important to place the measurement of half of the rectangle at the top point of the “goose”...in this case the centre of the goose is at the 3 ¼” mark (where the awl is pointing). Notice that the seams at both bottom corners are also at the 3 ¼” mark (where the white line is).
Once the ruler has been positioned properly trim along the right side and along the top.


Turn the goose around, place the 3 ½” x 6 ½” markings from the ruler along the previously trimmed corner and trim the other two sides. The diagonal line on the ruler should line up with the diagonal stitched line of the goose.


Bam! Four flying geese! I don't know about you, but I love making flying geese units especially when they're bright and scrappy. Join me next time for learning about a couple of specialty rulers for making trimming them even easier.