Written by Amy Elizabeth
The Diana F+ has been a camera in my arsenal for years now.
It’s a fun little camera that travels well and gives shots a dreamy quality with its plastic lens, drastic vignetting, and limited focus options.
One thing about the Diana F+ that I have grown to especially love is the built-in pinhole feature.
In high school photography class, we were assigned the task of creating a pinhole camera, and I enjoyed doing the calculations in order to make the focal distance, negative size, and pinhole diameter work in tandem.
But having a functioning camera that is pinhole-ready and can easily switch between the lens and the pinhole just makes life easier.
So in lieu of making your own pinhole camera, I highly recommend using the Diana F+ as your foray into the world of pinhole photography.


What is Pinhole Photography?
If you’re unfamiliar with pinhole photography, it’s essentially photography without a lens.
Instead of a lens, a very, very small hole (a pinhole, if you will) is used to allow light to hit the negative.
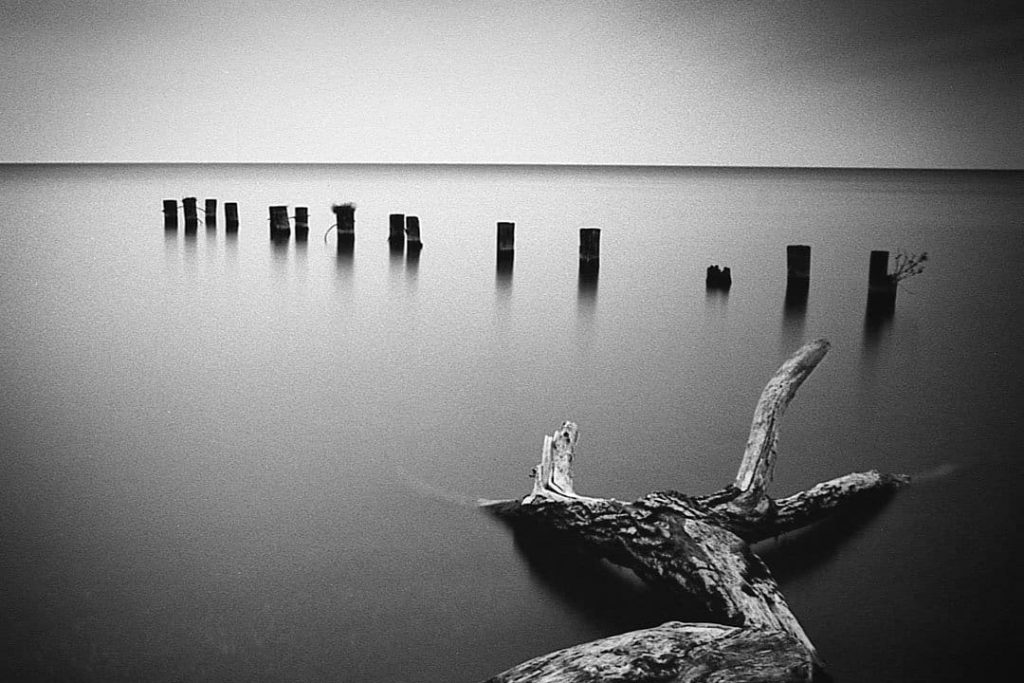
Because the pinhole aperture is so small (on the Diana, it’s f/128), the exposure length often needs to be quite long to get a proper exposure, so pinhole photography is also great for people wanting to take on long exposure photography.
The tiny aperture also means no focusing is involved, as everything in the shot will be equally in focus.
Now that I’ve hopefully convinced you to give the Diana F+ pinhole a try, let’s walk through how it works.


Related: An Intro to Pinhole Film Photography
How to Operate the Diana F+ in Pinhole Mode
- Twist off the plastic lens: to do this, grab the ridges of the lens and twist counter-clockwise. This will free the lens from the camera.
- Put the camera in pinhole function: turn the aperture on the bottom to the “P.” This will ensure the aperture is changed to the pinhole setting, which is approximately f/128.
- Change the shutter: Turn the shutter from normal (N) to bulb setting (B). The normal setting corresponds with a shutter speed of approximately 1/60 second, and that will be way too fast for the pinhole function. The bulb setting allows you to hold open the shutter for as long as you need to.


Calculating Pinhole Exposure Time
Now that you have the mechanics of the camera in order, let’s talk about how to determine the exposure.
There are a couple ways to do this:
- Use a light meter for more accurate times.
- Use the handy chart for more approximate times.

Using a Handheld Light Meter and Mathematical Calculations
I often use my handheld light meter (a Sekonic L-358) to get my exposure time for pinhole shots.
I meter bulb-in, in the shadows, at the smallest aperture the light meter gives me, which is f/90.
So how do I get my reading for the actual aperture of f/128?
Well, let’s get mathy for a second, shall we?
We know aperture stops work in powers of the square root of 2. The aperture f/90 is calculated by taking √213 and f/128 is calculated by taking √214.
Because we know 14 is one more than 13, the apertures are one stop apart, so whatever reading I get for my exposure length at an aperture of f/90, I double it to account for my actual aperture being at f/128.

Using an Exposure Chart
You can also keep a chart handy (I keep this chart in an album on my phone for easy access), and use it to get a good approximation when you’re out and about.
It’s definitely the handiest, cheapest, and easiest option. Just remember that film loves light, so I always err on the side of a longer exposure whenever in doubt.


Taking the Photo
Another plus of using a Diana F+ as a pinhole over a homemade one is that the Diana has a tripod mount at the bottom. And you will definitely want a tripod to keep your camera stable during these long exposures.
You will also want to use that silly black plastic piece that’s attached to the camera.
Yes, this black piece isn’t just a throwaway. It’s meant to jam into the shutter release slot to keep the shutter open without having to hold down the shutter lever the whole time, which can also cause camera shake during the shot.

To reduce camera shake effects, I cover the pinhole while I’m depressing the shutter knob and jamming in the black piece.
Then, I uncover the pinhole during the exposure length, recover it when my time is up, and remove the black piece, allowing the shutter to close again.
Wind to the next frame and start all over again!
Although a bit fussier than just shooting the Diana with the plastic lens, using the pinhole feature is very fun and not terribly complicated.
So next time you pick up your Diana, twist off the lens for a frame or two and have your hand at some pinhole magic!


Thank you so much, Amy! Amy is a regular contributor here at Shoot It With Film, and you can check out her other articles here, including Self-Portraits on Film: Tips to Get You Started and An Introduction to Cross-Processing Film!
To see more of Amy’s work, be sure to visit her on her website and Instagram! Amy also shares tips and tutorials for shooting film over on her IGTV channel. Go check it out!
Leave your questions about using the Diana F+ for pinhole photography below in the comments, and you can pick up a Diana F+ for yourself on Amazon!


Blog Comments
Jen Stamps
October 29, 2021 at 9:25 am
Amy! This is amazing. I never know how to meter for pinhole so your math and the chart is so helpful. I also like your idea of covering up the lens/pinhole while you put the plastic piece in to avoid unintended camera movement. Ahhhh, I need to get my Diana out now! Brilliant.
Amy Berge
October 29, 2021 at 9:16 pm
JEN! You are too kind!!!!! Get out that Diana and have so much fun with it!!!!!! You’d create magic, to be sure.
Jodi
November 14, 2021 at 1:49 pm
I love using my Diana pinhole. In fact, it’s the only way I like using my Diana camera. 😉
I am really enjoying your tutorials! Lots of fun projects to try!
Amy Berge
November 19, 2021 at 4:16 pm
It’s such a fun way to use it! And yay! So glad you’re finding projects amidst them!