Export UV Layout (Texture Maps for IMVU)
Table of Contents
Within the context of meshing and general content creation for IMVU a texture map is an image template that represents the 3D structure of mesh as a flat 2D layout, essentially the 3D object is cut apart and spread out so it can be painted. In Blender this is typically done using Export UV Layout.
Important: although the process discussed below relates to IMVU content creation it applies generally wherever UVs need to be exported from Blender for additional editing.
UV Unwrapping
As briefly mentioned above a texture map is essentially a wire frame or other image-based (mapped) representation of a mesh. For there to be a one-to-one correlation between image and mesh the latter (mesh) needs to be fully UV Unwrapped and then UV Mapped with the former (image). Exactly how this is done varies depending on the mesh itself, the UV’s that are unwrapped from this, and the number of images (via Materials) assigned to the result, i.e. a mesh upper (top) with front, back and sleeves mapped to multiple images is consequentially different to all three being mapped to a single image image.
Design note: generally speaking although UV Unwrapping and UV Mapping are often used interchangeable to mean the same thing they are actually different parts of the broader process of applying textures to objects, in essence; UV Unwrapping generates a layout, a 2D representation of the mesh; UV Mapping positions an image relative to the layout. To learn more about UV Editing click here.


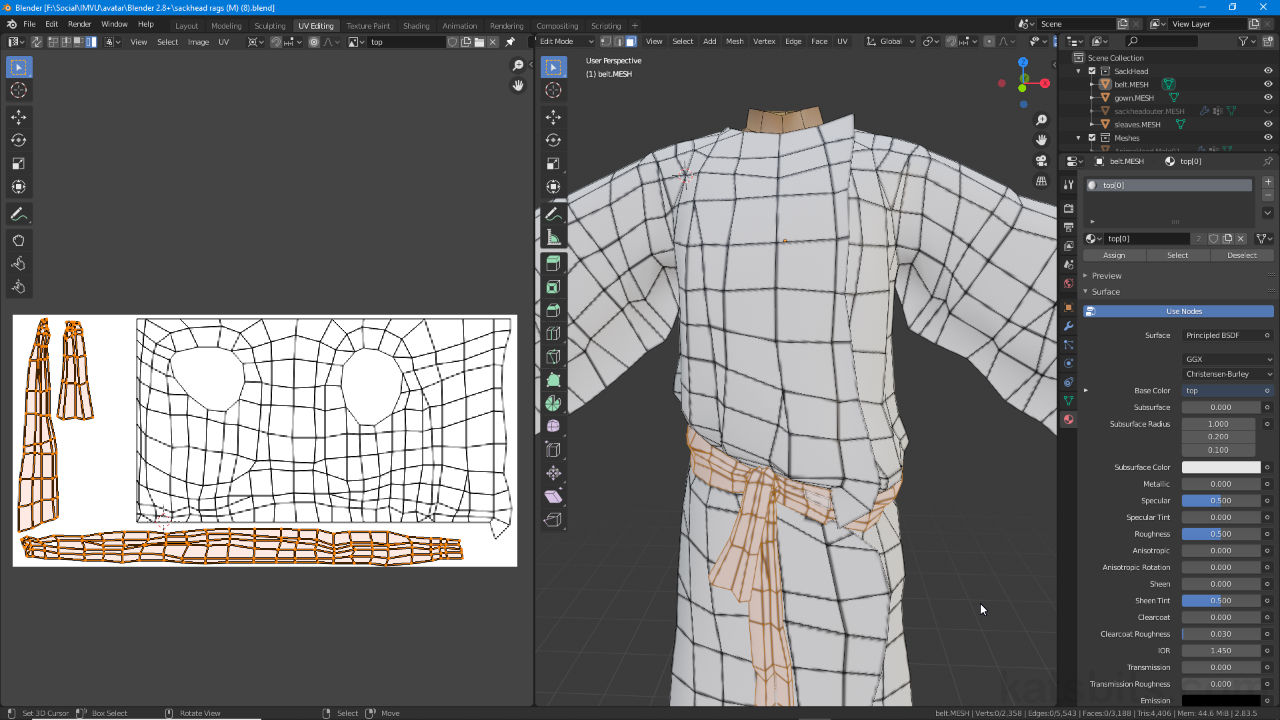
Being able to export a texture map or image that can be used for painting requires a UV map. The form this take will differ depending on several factors not least of which is the number of images used to texture the project and how they relate to the UV maps; one image per UV map (top) or one for all maps (bottom).
Export UV Layout
Once UV unwrapped and mapped in the UV Editor (UV Editing Workspace), the wireframe produced by the process can be exported using Export UV Layout. As exporting UV’s is selection based ensure the appropriate mesh section is selected in the 3D View (right side) so the corresponding UV’s highlight in the UV Editor (left side) [1], then from the UV menu [2] select Export UV Layout [3] – UV » Export UV Layout. This opens the File Browser.

Exporting UV’s is selection based so ensure the appropriate section of the mesh is highlighted in the 3D View so the corresponding UV’s can be seen and exported [1] then from the UV menu [2] click Export UV Layout [3].
In the Blender File View window that opens, on the right (Settings/Properties) select the type of image to be saved using Format, typically *.png [4], and set the Fill Opacity to 0.00 for wireframe only, or 1.00 for a version with filled faces (the default 0.25 generates a transparent map) [5]. Change the file name and save location as needed then click the Export UV Layout button [6] to complete the process.

In the Export/File Browser (Blender File View) appears change the settings as required setting the Format [4], the Fill Opacity [5] and then clicking the Export UV Layout button [6] to finish.

Once the UV texture map is exported it can be opened in an image editor (Affinity Photo shown) for painting and modification. Once done this can be used in IMVU once the produced is imported.
Replace Image
Texture maps are not just useful for IMVU. Being a wireframe they can replace temporary generated image data which better represents the final product in IMVU. To do this select and object or mesh element using the Material list – highlight a Material in Material Properties then click the Select button. In the UV Editor ensure the correct image associated with the selected UVs is shown – click the Browse Image to be linked button and select it from the list [7]. Next, click the Image menu [8], then Replace… [9] – Image » Replace….

Texture maps can also be used in Blender to give a better approximation of a products appearance in IMVU but will need to be loaded back in using Replace… – make sure the appropriate image is displayed in the UV Editor [7] then use Image » Replace… [8 & 9].
In the Blender File View window that appears, browse to and select the image to be loaded [10] then click the Replace Image button [11]. Blender will bring in the image, assigning it to the UV map and associated Material, displaying it on the mesh subject to Viewport Shading being set to Material Preview or Rendered view.

… which opens Blender File View where the appropriate image can be selected to replace the temporary generated asset, select [10] then click Replace Image [11] to complete the process.
