KeyShot comes packed with over 100 textures you can use, including wood, metal, and various types of texture maps – adding just the right amount of realism to your model. However, there are about a billion other textures and appearances out there that might catch your eye
What if you want to create your own? Well, it’s extremely easy. We’ll break down how to create a bump map, and then demonstrate how to create a color, specular and opacity map to go with it. Check out these simple and extremely fast steps using Photoshop.
What are Bump, Color, Specular and Opacity Maps?
First, here are a few quick definitions of the different types of maps.
Bump Map – Uses white and black values to create the appearance of raised and lowered areas.
Color Maps – Uses an image to replace the color of the material.
Specular Map – Uses white and black values to create areas of more reflectivity and less reflectivity.
Opacity Map – Uses black and white values to create transparent areas and opaque areas.
How to Create Bump, Color, Specular and Opacity Maps (Really Fast)
There are various ways to create these types of maps, from taking photos of textures to finding them online, but to create all four map types the method below is the absolute fastest, easiest route. Before we start, this assumes you have a basic understanding of the Photoshop interface.
Step 1: Create a texture in Photoshop
Create a new image at 1200 x 1200 pixels. Add a new layer then select the brush tool (B). Select your preferred brush, the color you would like to use for texture and paint away. You can download custom brushes from sites like brusheezy.com. You can also modify the Brush settings by going to Window > Brush and adjusting the Brush options. You’ll end up with something like this.

Step 2: Create the Color Map
If you want the unpainted (white) areas to be transparent, hide the Background layer. Then save the image as a .PNG format to preserve the transparency. This will allow the painted areas to show on your model with the diffuse color showing in the transparent areas. You should have something like this.

Step 3: Create the Specular Map
Double-click on the painted layer to bring up the Layer Style options. Select Color Overlay and choose Black as the color. Save the image as a .PNG format to preserve the transparency. The black areas will have 0% reflectivity and the white areas will be 100% reflective. The image should look something like this.

Step 4: Create the Bump Map
Show the background layer, then save the image. The black areas will appear lowered and the white areas will appear raised. If you like, you can add a little blur (Filter > Blur > Gaussian Blur) to make the transitions smoother. The image should look something like this.

Step 5: Create the opacity map
Flatten the image (Layers > Flatten Image) then select Image > Adjustments > Invert. You have a few options in KeyShot for Opacity maps, but basically, this will show the black areas as completely transparent and the white areas as completely opaque. This assumes that you want the painted areas to be the opaque areas. You should have an image like this.

The value of creating all of these together like this allows you to sync all maps together perfectly when adjusting the scale and position within KeyShot.
Another options for materials is adding in a Roughness texture. You can find a detailed break down of that right here. If you want to take materials and textures even further, creating advance materials and textures, you’ll want to learn more about the KeyShot Pro Material Graph. Be sure to check out the full KeyShot manual right here.
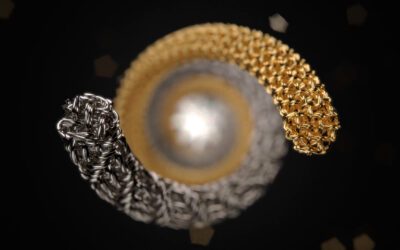
Here’s one more shot with a different color map and diffuse color.
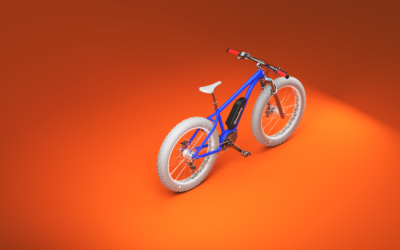
 Model by Manolis Theofilos via GrabCAD


0 Comments