

Chapters
Perhaps every child in the world has made and played with an origami fortune teller – it was certainly my first brush with folded paper creation.
Of course, at the time I had no idea I was manipulating a genuine origami design... and, quite possibly, neither did/do other children on the planet.
Have you ever made one? Have you ever made a paper aeroplane, a paper boat or even paper flowers? Did you know you were actually practising origami?
The art of creating shapes out of paper is centuries old; an exacting exercise that teaches patience, discipline and helps develop fine motor skills – much the way handwriting does.
But making an origami dragon is much more fun than practising penmanship, even if it does offer substantial educational benefits.
A part of origami’s appeal is that you don’t need scissors, glue or glitter to adorn your creations, just square paper and knowledge of basic folding technique.
That is what your Superprof offers up today: we’re going to look at some simple origami creations, a few methods to enhance your origami and finish up with some more complex designs.
Are you ready to learn the art of paper folding?


Easy Origami: Simple Folds

A long time ago, the paper art known as origami involved cutting as well as folding and, to be sure, there are still paper arts that involve snipping: découpage is an example of such that is currently en vogue.
The only cutting you may need to do to make origami animals is reducing a standard sheet of paper to a square – square paper is the standard in origami.
Starting with a square of paper, fold the paper in half to form a rectangle. Be sure that the corners are aligned before putting pressure on the folded edge. Once you have a defined edge, unfold the paper.
Congratulations! You have just executed your first mountain fold.
Now, flip your paper over and repeat the exercise. Align the corners so that your new fold is perpendicular to the one you’ve already made, making sure your paper has a marked crease, and then unfold.
Excellent! Now you’ve mastered the valley fold.
These two are the most basic and the most important of all origami folds. Indeed, every origami incorporates either a mountain or a valley, or some combination thereof.
Another easy fold is called a pleat. Just like pleats in drapes or clothing, origami pleats can give your work extra depth.
To make a pleat, measure off one-third of the length of your paper and then fold along that line. For example, if you are working with a 30 cm square, make your fold at 10 cm.
Once properly creased, flip your folded paper over and fold the other edge to meet the line of the first fold. Press your folds firmly before releasing. Your pleat should resemble the letter Z.
If you happen to have a road map, you can see this pleating in action. Or, before the next heatwave, you may want to pleat a paper fan...
Crimping is a lot like pleating but on a bit smaller scale. You might say that crimping involves putting a notch into your design while leaving the rest of the paper uncreased.
To make an effective crimp, start by making a mountain fold and then restore your paper to its open position. Next, somewhere along the first quarter to third of the page, make another fold, as though you were making a pleat.
The next move really depends on you: how deep of a crimp do you want?
You can make a shallow crimp by folding the paper back at just a centimetre or you could go for a more generous one by folding back at five centimetres.
The important part is that your folds do not run across the entire width of the paper. Perhaps you might visualise a small-bodied Z with long tongues on the top and bottom.
These are basic folding techniques to get you started in creating origami; you will also need to know a few ‘bases’: folding patterns that can be used in creating many different origami shapes. We’ll start with the most common.
- The square base (or preliminary base): fold your paper diagonally; again fold corner to corner. Raise one of the flaps, squash it down and fold; repeat with the other side.
- The kite base: fold your paper diagonally and reopen. Using that fold as a central axis, bring the right corner to the centre, followed by the left corner. Your paper should now resemble a kite.
- The bird base: it starts with a square base but gets a bit more involved; ultimately, you end up with a long diamond.
- The frog base: considerably more steps than any of the bases discussed thus far.
- The fish base: fish are a symbol of peace and contentment; you too will be happy to hang brightly coloured fish around your room!
Explaining each of these bases is a complex undertaking and, if you are the type of person who needs to see to understand, perhaps looking at diagrammes would be more helpful.
Join the discussion: why is origami integral to Japanese culture?

A Word on Paper
You could certainly use any type of paper to practise your folds and bases but it is recommended that, once you start creating origami art, you use only origami paper.
This type of paper is more durable and resilient than ordinary paper, the better to hold your creases and folds. Also, you may select a two-tone paper to give your creations added flair. Best of all: origami comes pre-cut into squares!
Before you rush out to Hobbycraft and buy out their supply of folding paper, there are a few things you should know.
Folding paper comes in all colours, grades and sizes.
Your ideal starter pack is kami paper; it is two-sided – meaning it is white on one side and coloured on the other. It is thin, smooth and holds creases really well.
If you are looking for a more versatile paper, Tant would be for you. Made in Japan, it is very flexible and comes in many colours. Its biggest downside is that it does tear rather easily.
Washi paper is handmade using long cellulose fibres. Very strong and durable, this is the elite of origami paper.
Many craft stores stock all types of origami paper including Japanese paper. Just ask the helpful clerks to direct you to the paper arts section to see for yourself what is available.
We have just enough time left to tell you about a few origami projects you might undertake before you chime in on why origami is so important to the Japanese...
How to Make Origami Flowers
Now that you have raided the crafts store and bought all the paper you need for your origami projects, let’s start out with a relatively simple origami flower.
Fold the paper of your choice into a kite base (see above) and rotate it so that the open flaps are at the top. Fold the first flap down, exposing the two, narrow-angled flaps.
Fold those two flaps at a 45 degree angle to the downturned fold you just made, and then fold the last flap back. Voila! A two-dimensional flower! If you’d like, you may use pinking shears or scissors to define the petal edges.
Are you ready for some more intricate flowers?
Kusudama is the Japanese art of sewing or glueing individual origami together; in this case, we would make multiple flowers and then fasten them together to make a ball.
These step-by-step instructions will guide you to getting it right on the first try but we do offer this helpful tip: you might use smaller paper squares to make the individual flowers.
Did you know that ninja stars have just about the same appeal as flowers do?
If you lead an origami for kids workshop, your young warriors might like to make these rather than paper blooms.
Start with two pieces of origami paper side by side. It would lend a neat effect if your papers were of different colours.
Fold both sheets in half lengthwise, and then again, so that you end up with two long, narrow strips. Now fold each strip in half to make a guiding crease.
Fold the bottom half of each strip 90 degrees to the right; flip the folded strip over and repeat with the top half, folding it to the left. Repeat with the second strip.
Your little origami warriors are going to be so excited to see their stars come to life!
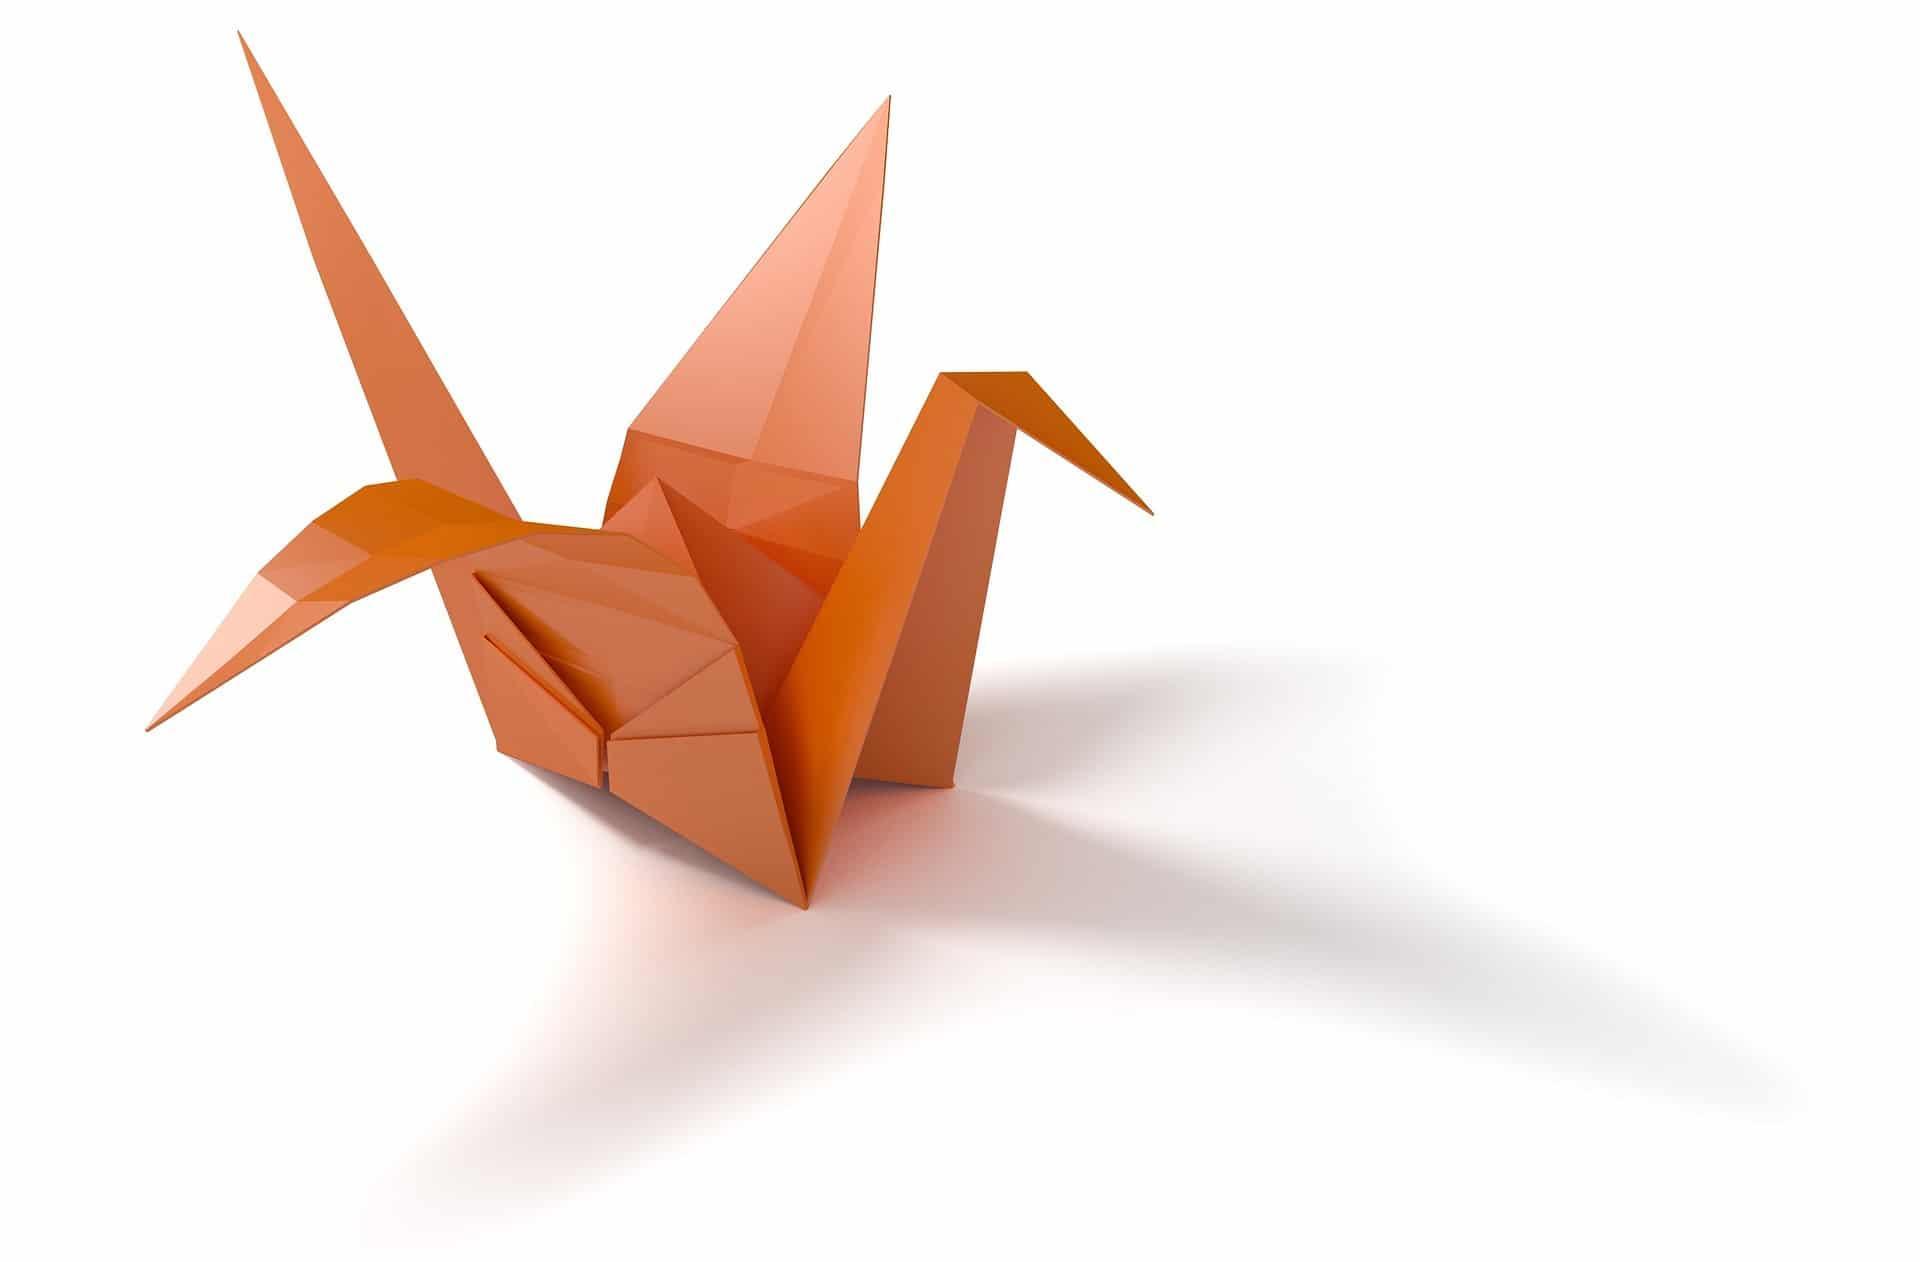
How to Make an Origami Crane
Cranes have special meaning in Japanese culture; they symbolise hope and healing; peace and long life. You can learn more about origami cranes in our history of origami article.
In light of that, we could hardly close this article out without any folding instructions for the most renown of all origami models.
This is an easy-to-intermediate model involving only one sheet of paper. It starts with a square base and follows 22 precise steps.
To make the prettiest crane, you might use multi-coloured paper or even foil paper... just make sure that it can withstand multiple folds without tearing.
Once you’ve mastered how to make the iconic paper crane, you might move on to more intricate origami designs; you may even want to try your hand at making paper. It’s not that hard!
With Christmas just around the corner, now is the time to think about how you’ll wrap all of those gifts; using an origami butterfly to identify each parcel instead of a name tag would make your offerings so much more personal!
Now discover the poignant symbolism of origami.
You can also check out our article on Japanese classes London.
Enjoyed this article? Leave a rating!


